
Sweet- Treat Candy Card

Hi everyone! Are we all ready for Christmas? I thought I was until I realized that I didn't have a little something for the kiddos teacher (the night before the last day of school before break this weekend, oops). So I decided to make a quick sweet-treat card for them.

I am gonna share this tutorial with you and on She's a Sassy Lady Blog. I am Guest DT for today over there too. Its another great tutorial site you might want to check it out :)

How to make a Sweet- Treat Candy Card

Here is what you will need:
trimmer, bone folder, ribbon, scissors, craft knife, cardstock 8 1/2x11, score tape and candy


First you will score at 3cm, 6cm, 9cm and 12cm horizontally and then turn paper vertically and score at 3cm, flip and score other side at 3cm 

Next, cut at score lines to 3cm vertical fold and then trim off to the first score line. See photo below.

In the second column, you are going to make your window.  

After you make your window (I just used my trimmer), You will add the score tape to the last column and the bottom backside of the second column tab, see below.

Now go ahead and start to fold over the score lines to make your box and fold bottom tabs to close the bottom. 

Now because I didn't use a piece of clear acetate, I went ahead and using my craft knife, made a slit in the middle of my card base for my ribbon to slide through.

Go head and add your candy, You can see below that 4 pieces work great.

Now add your finished card to you box base and tie your ribbon to help hold the candy in place (worked like a charm)

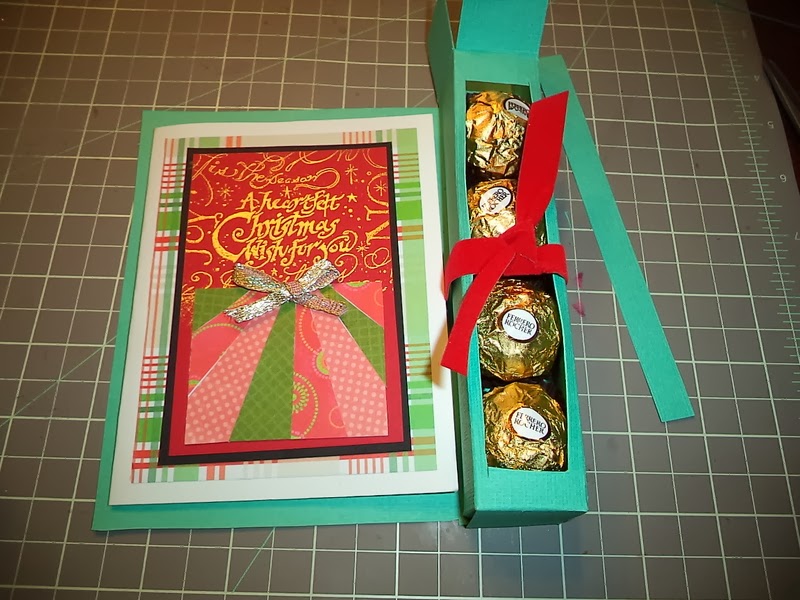
For this card, I added a small tag to embellish the sweet treat box part.

Very easy to make and is a little different from the tea light cards.

Here are my three finished cards...


Thanks for stopping by and don't forget to hop over to Scrapbook Blessings Club to check out the current challenge: any project with a tag on it. Kenny K is the challenge sponsor and it will end Friday at midnight.

Comments

Popular posts from this blog

My Favorite Craft Tools and Giveaway!!!

Hi everyone, Today's video is a fun one for me. Since getting back into crafting I have noticed that I am pulling certain items over and over again and thought it would be fun to share with you. Two years ago, I took a step back from crafty and downsized 75% of my craft room.  However with just these awesome tools, I have been able to get back into the swing of things and I don't miss having a larger craft room. Personally, I feel every crafter should have these starting out.  They make creating easy and fun! Tools mentioned: Misti, Neehna Bright Cardstock, Distress Oxides, Ranger Dylusions die cut, In Love Art Shop word die cuts, ATG, Prismacolor Pencils, premade cards,Fiskars cutting blade and trimmer, Zig color pens, Wink Of Stella, Alcohol markers, t-ruler, Westcott 0 ruler, 6x6 paper pads, Versamark, EK Success powder tool, 3d Crystal Lacquer, Tombow adhesive, Momento/Hero Arts black ink, Cricut, Chameleon Black Pen, Pencil, Grid stamping block, etc. For the mont

MFP Stamp Shop June Blog Hop

Welcome to the MFP Stamp Shop June Blog Hop Let's get started!!!! This month's new Stamp Set Releases are: Featured  June 23 Paper Doll Chuck Featured  June 24   Paper Doll Chuck Formal and Hunting Featured  June 25  Background Diamonds and Flowers Featured  June 26 Pots and Vases 2 Please Hop along with us!! You have a chance to win one of these new stamp sets! Just comment on the following blogs ( don't forget this one ) each day for more chances to win! ( You do NOT need to comment on on all the blogs each day! The names are drawn randomly.) The winners will be announced on June 26, 2015 right here on the MFP Stamp Shop Blog. You can go back and comment if you missed a day. ( HINT: The more you comment the more chances you have to win. And comments on the MFP blog count twice. ) The deadline for commenting is Friday June 27, 2015 at 10:00 PM EST. Okay for this card, I went a different route. I thought with the holiday coming up, why not try to make Chuck's hunting ou

Building Block Graduation Card

Hello, everyone! Melissa here on to share a "building block" style card with you. I made this one graduation themed, since there are a ton of graduations going on right now. Hope you enjoy this card, and are inspired to try it out yourself. Here is the tutorial I followed from Split Coast Stampers. To make it easier, I will give you all the measurements, here. It looks harder than it is, I promise. Start with a piece of cardstock in your desired color that is 5.5 x 10.5. Put the 10.5 inch side along the top of your score board or paper trimmer, and score at 3.5 inches and 7 inches. Fold the first score line in a mountain fold, and the second in a valley fold. You should end up with a "z" fold card. The next part can get a bit tricky, so make sure you watch the video to fully understand what I am about to explain. On the back side of the "valley" fold, take a ruler and pencil and mark these measurements: 3/8 1 3/8 1 5/8 2 5/8 2 7/8 3 7/8