
Throwback Thursday: Gatefold Card Tutorial

Hi Friends, Sandy here for Throwback Thursdays. But first my tip for you: A very easy and mess-free glitter medium is Stickles. I like using "Diamond" color. It goes with every project!

This is a oldie but a goodie, perfect for the new crafter and a quickie for the advanced crafter. Plus this was one of my first cards and I love looking back and seeing what I made years ago.


So here is one of my very first tutorials...
**************************************************
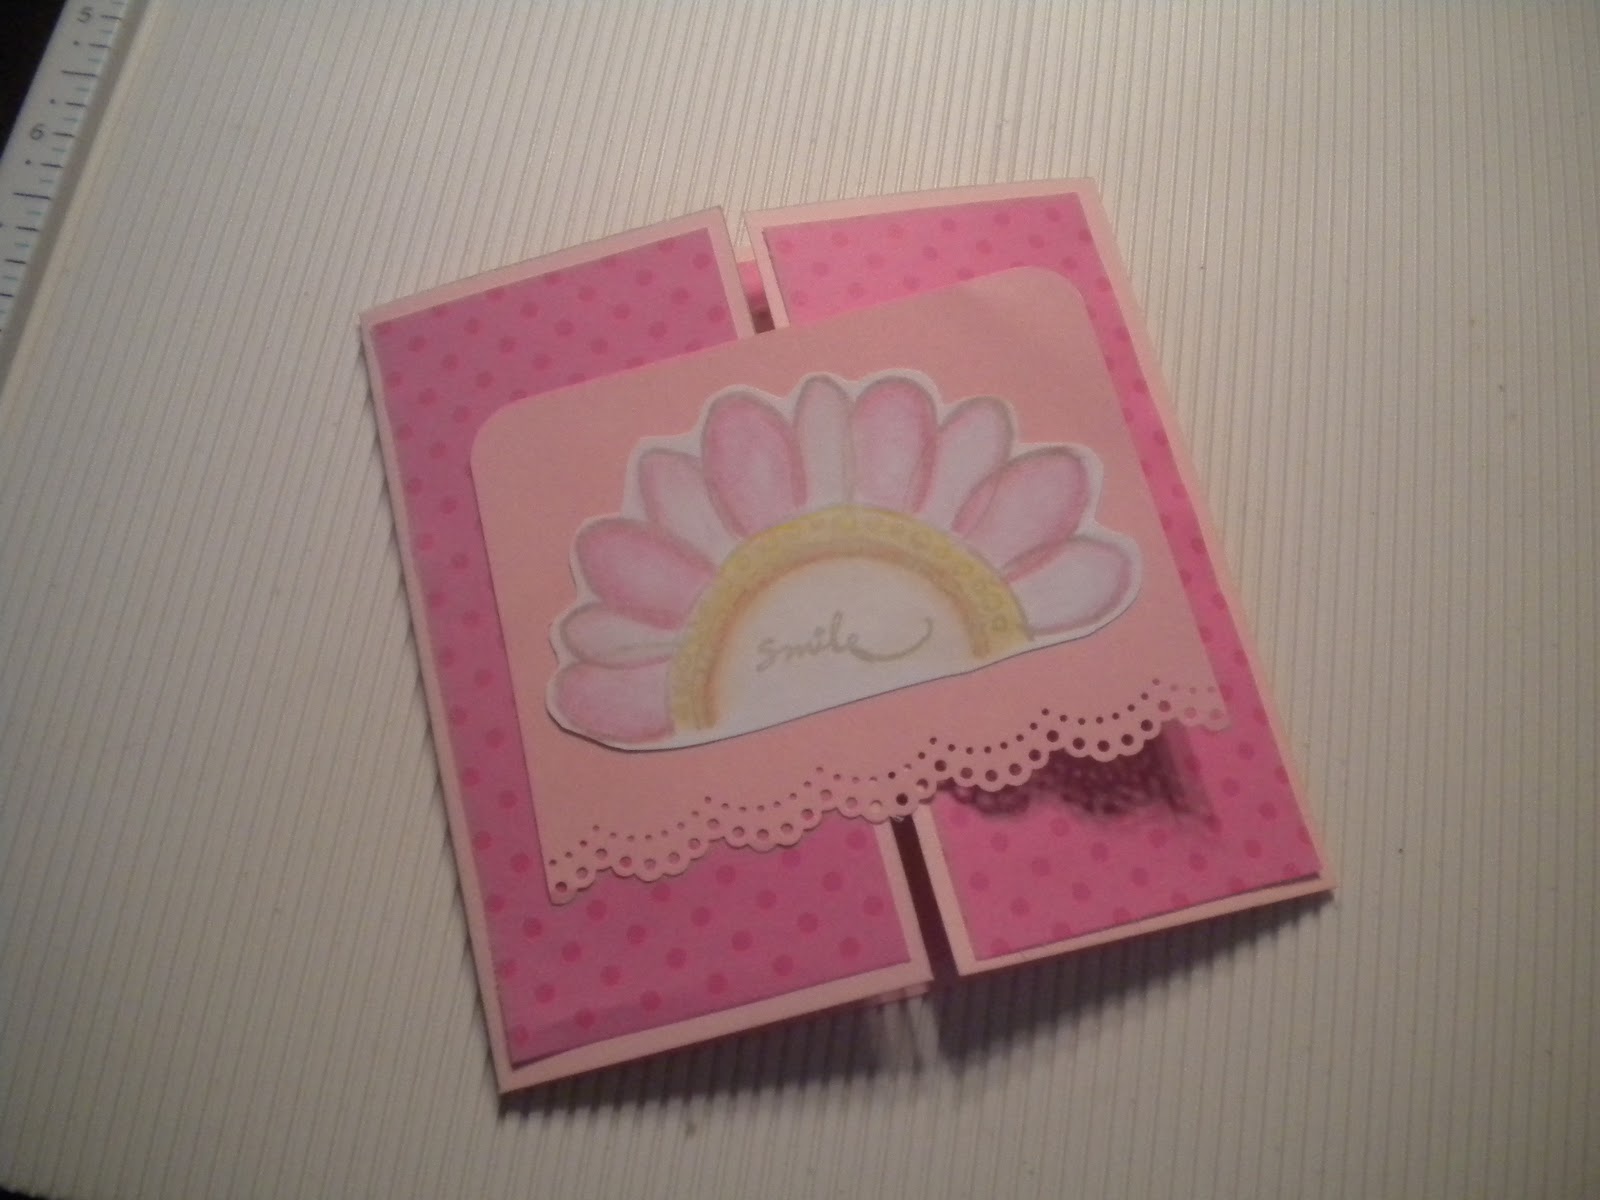
Do you make your own cards?  They are easy to do and you can make a bunch for just pennies.  I went to the store the other day and was shocked at how much a card was?!?!?! I wanted to show you a card fold that I just love! It is called a gatefold card and you see them around quite a bit. For this card, you can make it any size you want. This is how I did this one...
  • I started with a 5 x10 piece of cardstock.
  • Score in 2 1/2 " on either side, giving you a 5 inch base.
  • Then cut you pattern paper a 1/4" shorter ie : cut (2) 2 1/4 and (1) 4 3/4
  • Adhere the papers to the base

  • Decorate the inside of your card
  • Then cut a second piece of cardstock for "gate" part of your card
  • I cut mine 3 x4
  • Adhere it to the left flap of your base card
  • Decorate/embellish it like you want
There you go! A very easy card to make, esp in any size and shape :)

I hope your enjoyed today's project too. If you have a question, please leave it in the comments, and a DT member will get back to you. You can find more inspiration and projects at my blog: A Working Mom's Joy. Also, you can join up to our Facebook group: Scrapbook Blessings Club for more fun, games, inspiration, tips and techniques.      

Hope you have a blessed day and thanks for stopping by,
Sandy Hentzel
SBC Team Designer

Comments

Post a Comment

We love comments! Please let us know what you think.

Popular posts from this blog

My Favorite Craft Tools and Giveaway!!!

Hi everyone, Today's video is a fun one for me. Since getting back into crafting I have noticed that I am pulling certain items over and over again and thought it would be fun to share with you. Two years ago, I took a step back from crafty and downsized 75% of my craft room.  However with just these awesome tools, I have been able to get back into the swing of things and I don't miss having a larger craft room. Personally, I feel every crafter should have these starting out.  They make creating easy and fun! Tools mentioned: Misti, Neehna Bright Cardstock, Distress Oxides, Ranger Dylusions die cut, In Love Art Shop word die cuts, ATG, Prismacolor Pencils, premade cards,Fiskars cutting blade and trimmer, Zig color pens, Wink Of Stella, Alcohol markers, t-ruler, Westcott 0 ruler, 6x6 paper pads, Versamark, EK Success powder tool, 3d Crystal Lacquer, Tombow adhesive, Momento/Hero Arts black ink, Cricut, Chameleon Black Pen, Pencil, Grid stamping block, etc. For the mont

MFP Stamp Shop June Blog Hop

Welcome to the MFP Stamp Shop June Blog Hop Let's get started!!!! This month's new Stamp Set Releases are: Featured  June 23 Paper Doll Chuck Featured  June 24   Paper Doll Chuck Formal and Hunting Featured  June 25  Background Diamonds and Flowers Featured  June 26 Pots and Vases 2 Please Hop along with us!! You have a chance to win one of these new stamp sets! Just comment on the following blogs ( don't forget this one ) each day for more chances to win! ( You do NOT need to comment on on all the blogs each day! The names are drawn randomly.) The winners will be announced on June 26, 2015 right here on the MFP Stamp Shop Blog. You can go back and comment if you missed a day. ( HINT: The more you comment the more chances you have to win. And comments on the MFP blog count twice. ) The deadline for commenting is Friday June 27, 2015 at 10:00 PM EST. Okay for this card, I went a different route. I thought with the holiday coming up, why not try to make Chuck's hunting ou

Fiskars AdvantEdge Punch System Review

Good morning friends, Carolyn here with a review of a new tool I just recently purchased.  Received a newsletter from Scrapbook.com recently and checked it out.  But I did not purchase from Scrapbook.com as it's out of stock, so went to another source, and it arrived this past Saturday afternoon. TIP:  Easy way to create borders for your scrapbook page layouts, or embellishing the page or creating edges for your cards.  Gives you ease of creating a border across the edge(s) of paper; and create a border strip and cut down to size you would like for embellishing a sentiment mat for a card or front of card. Supplies used: Fiskars AdvantEdge Punch System Fiskars' smaller interchangeable border punch cartridges - double scalloped edge   Fiskars AdvantEdge Punch System Here is a short write up about the system: The unique design of the AdvantEdge Punch System by Fiskars allows crafters to add perfectly aligned decorative borders and ribbons to any pr