
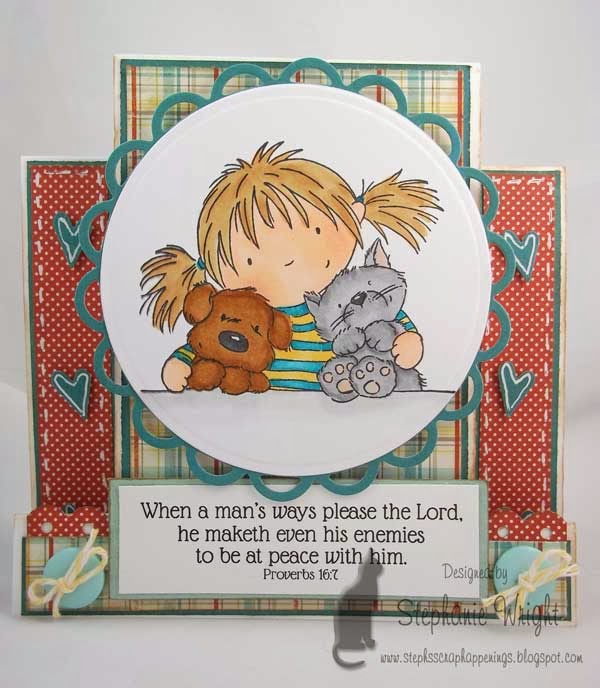
Hello everyone Cristina here to share with you our wonderful guest designer. Stephanie was one of the top 3 DT picks for our Challenge #13 Card Fold with her wonderful card. We are so happy to have her as our guest.


 Hi, my name Stephanie Wright. I’ve been saved by God’s amazing grace. I met my Mr. Wright *grin* while in college and we were married in late December 1984. My husband and I have been in full-time ministry our entire marriage. We moved to Kentucky in July 2012 so that my husband could take a new pastorate and teach in a Christian college. The Lord blessed us with two children, Ian & Kendra, and I had the privilege of homeschooling them. Our son and his wife live in Virginia and are the parents of our precious grandson, Jack (aka Sir Cuteness). Our daughter is a newlywed living in SC while attending grad school at a Christian college.
While I have enjoyed many different crafts all my life, I started scrapbooking in 2004 with the intent of making a sports scrapbook for Ian's high school graduation party. By Fall 2008 I found my focus turning to making cards and other paper crafts. While I love the look some crafters achieve with CAS designs, my "style" usually involves layers, faux stitching, and die cuts.
I currently have the privilege to be on two different design teams. To me, card-making is more than just a hobby; I see it as a ministry tool as well. That’s one of the reasons I enjoy using Scripture on my cards. I’m usually supervised while crafting by at least one of our three cats.
Some of my favorite tips:
Must-have tool: A must have tool in my craft room is a pair of tweezers. I use them for pearl/rhinestone placement, paper piecing small pieces, holding my paper while heat embossing and lots more.
Organizational items: Think "out of the box" when it comes to organizational items. For example: I have a drawer unit intended for screws holding brads and other small embellishments. A wire kitchen rack is the perfect Stickles unit. It holds the bottles upside down and allows me to store other items under it on my shelf. My newest treasure is a cassette tape rack handmade by my father-in-law that will be perfect for my ink pads. I just acquired this and haven't moved into it yet but it will fill an organizational need and gives me room to grow!
Die Storage: I store my dies in empty CD cases. I purchased magnetic vent covers at Lowe's/Home Depot. They come cheaply in packs of two. By cutting each 8" x 15" vent cover into 4" x 5" pieces, I can have magnetic sheets for a dozen sets of dies for a very low cost. I don't adhere the magnetic sheet to the case because I also keep a sample die cut for each die in the set in the case too. These samples tremendously when planning sizes for your card/project and/or combining die cuts. I then label the front of the case with the die name (and manufacturer if they are not Spellbinders) and store them in a drawer in my Jet Max unit.
Steph's Scrap Happenings http://www.stephsscraphappenings.blogspot.com/
Thank you to Stephanie for sharing her wonderful work and tips with us. Make sure to stop by her blog and see what other wonderful creations she has. Thank you for stopping by today.
Hope you have a Blessed day,
Cristina
Hi, my name Stephanie Wright. I’ve been saved by God’s amazing grace. I met my Mr. Wright *grin* while in college and we were married in late December 1984. My husband and I have been in full-time ministry our entire marriage. We moved to Kentucky in July 2012 so that my husband could take a new pastorate and teach in a Christian college. The Lord blessed us with two children, Ian & Kendra, and I had the privilege of homeschooling them. Our son and his wife live in Virginia and are the parents of our precious grandson, Jack (aka Sir Cuteness). Our daughter is a newlywed living in SC while attending grad school at a Christian college.
While I have enjoyed many different crafts all my life, I started scrapbooking in 2004 with the intent of making a sports scrapbook for Ian's high school graduation party. By Fall 2008 I found my focus turning to making cards and other paper crafts. While I love the look some crafters achieve with CAS designs, my "style" usually involves layers, faux stitching, and die cuts.
I currently have the privilege to be on two different design teams. To me, card-making is more than just a hobby; I see it as a ministry tool as well. That’s one of the reasons I enjoy using Scripture on my cards. I’m usually supervised while crafting by at least one of our three cats.
Some of my favorite tips:
Must-have tool: A must have tool in my craft room is a pair of tweezers. I use them for pearl/rhinestone placement, paper piecing small pieces, holding my paper while heat embossing and lots more.
Organizational items: Think "out of the box" when it comes to organizational items. For example: I have a drawer unit intended for screws holding brads and other small embellishments. A wire kitchen rack is the perfect Stickles unit. It holds the bottles upside down and allows me to store other items under it on my shelf. My newest treasure is a cassette tape rack handmade by my father-in-law that will be perfect for my ink pads. I just acquired this and haven't moved into it yet but it will fill an organizational need and gives me room to grow!
Die Storage: I store my dies in empty CD cases. I purchased magnetic vent covers at Lowe's/Home Depot. They come cheaply in packs of two. By cutting each 8" x 15" vent cover into 4" x 5" pieces, I can have magnetic sheets for a dozen sets of dies for a very low cost. I don't adhere the magnetic sheet to the case because I also keep a sample die cut for each die in the set in the case too. These samples tremendously when planning sizes for your card/project and/or combining die cuts. I then label the front of the case with the die name (and manufacturer if they are not Spellbinders) and store them in a drawer in my Jet Max unit.
Steph's Scrap Happenings http://www.stephsscraphappenings.blogspot.com/
Thank you to Stephanie for sharing her wonderful work and tips with us. Make sure to stop by her blog and see what other wonderful creations she has. Thank you for stopping by today.
Hope you have a Blessed day,
Cristina


Fabulous projects, Stephanie! Thanks for being our guest DT today :-)
ReplyDeleteAwesome projects Stephanie, can't wait to try some of them!
ReplyDelete