
Monday's Die Cuts- Explosion Box decorated w/ die cuts

Hi Friends, Sandy here for Monday's Die Cuts Project featuring embellishments.
But first my tip for you: cut more than you need and store away for another day
The cartridges I used for this project are: Life's a Beach, A Child's Year, Stamping, Graphically Speaking.
  I just did an Explosion Mini Album for a swap.  I love the wow factor that I get with these and they are soooo simple! I have lots of pictures for you...

You can find a great tutorial for the Explosion Box HERE  You can create a template for you box if you use the Gypsy or CCR to weld all your squares together. This is a great way to make a lot of these at one time without having to measure and cut every layer over and over.

Now for my die cuts, using my Cricut machine:
  • Summer- cut at 1.25" from Stamping cart
  • Memories- cut at .75" from Graphically Speaking

  • These images cut at 2.25" from A Child's Year 


  • These images cut at .5 to 1.5" from Life's a Beach 


  • Here are them all together including ones fro Stamping cart and Graphically Speaking 


  • Here are pictures of the inside of the album. Went with a summer theme throughout...


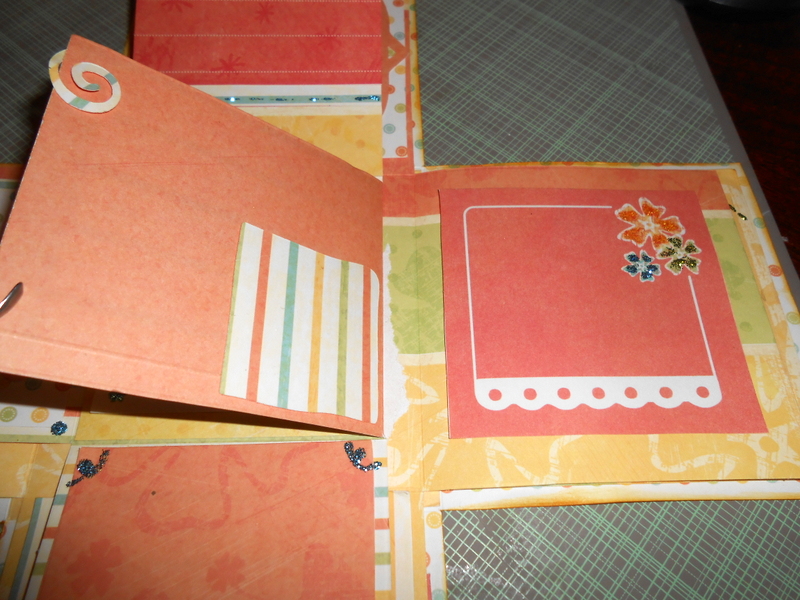
  • And here is the final product...


I hope your enjoyed today's project too. If you have a question, please leave it in the comments, and a DT member will get back to you. You can find more inspiration and projects at my blog: A Working Mom's Joy. Also, you can join up to our Facebook group: Scrapbook Blessings Club for more fun, games, inspiration, tips and techniques.      

Hope you have a blessed day and thanks for stopping by,
SANDY,
  

Comments

  1. I have made three of these, and really love them. Great job, Sandi.

    ReplyDelete
  2. Wow! This is such a great one! Wish I had ccr to my cricut but can't...

    ReplyDelete

Post a Comment

We love comments! Please let us know what you think.

Popular posts from this blog

My Favorite Craft Tools and Giveaway!!!

Hi everyone, Today's video is a fun one for me. Since getting back into crafting I have noticed that I am pulling certain items over and over again and thought it would be fun to share with you. Two years ago, I took a step back from crafty and downsized 75% of my craft room.  However with just these awesome tools, I have been able to get back into the swing of things and I don't miss having a larger craft room. Personally, I feel every crafter should have these starting out.  They make creating easy and fun! Tools mentioned: Misti, Neehna Bright Cardstock, Distress Oxides, Ranger Dylusions die cut, In Love Art Shop word die cuts, ATG, Prismacolor Pencils, premade cards,Fiskars cutting blade and trimmer, Zig color pens, Wink Of Stella, Alcohol markers, t-ruler, Westcott 0 ruler, 6x6 paper pads, Versamark, EK Success powder tool, 3d Crystal Lacquer, Tombow adhesive, Momento/Hero Arts black ink, Cricut, Chameleon Black Pen, Pencil, Grid stamping block, etc. For the mont

Building Block Graduation Card

Hello, everyone! Melissa here on to share a "building block" style card with you. I made this one graduation themed, since there are a ton of graduations going on right now. Hope you enjoy this card, and are inspired to try it out yourself. Here is the tutorial I followed from Split Coast Stampers. To make it easier, I will give you all the measurements, here. It looks harder than it is, I promise. Start with a piece of cardstock in your desired color that is 5.5 x 10.5. Put the 10.5 inch side along the top of your score board or paper trimmer, and score at 3.5 inches and 7 inches. Fold the first score line in a mountain fold, and the second in a valley fold. You should end up with a "z" fold card. The next part can get a bit tricky, so make sure you watch the video to fully understand what I am about to explain. On the back side of the "valley" fold, take a ruler and pencil and mark these measurements: 3/8 1 3/8 1 5/8 2 5/8 2 7/8 3 7/8

Independence Day Blog Tour

HAPPY 234th BIRTHDAY AMERICA!!!! To celebrate, I am participating in Operation Write Home BLOG TOUR.  Just click  HERE if you want to go on the tour with me! Of course the theme is... RED, WHITE and BLUE BIRTHDAY!   Here are my cards... If you would love to have these cute digi stamps, just head to OWH Stars and Stripes . They are all on here for free! I'll be doing a random drawing for some Birthday prizes. I haven't decided how many yet so all you have to do is leave a comment here.  If you are or become a follower, leave a second comment for another chance to win! For these cards, I used... Red/ white card stock and blue pp Silver Stickles Copics: red (R29),blue (B05), brown (E08)  For accent colors, I used my color pencils Scrappy Cat-  firework acrylic stamps and of course DIGI STAMPS!!! (my new found love, lol)