
It's Anything Goes Tuesday with Lynne here Showcasing a Free-Standing Lace Angel Embroidered Angel

It's Lynne here from Her Craftiness. I would love to show you my Brother Embroidery Machine and my current project - a free-standing angel bookmark or ornament.


This is a very simple, less expensive embroidery machine. With the machine, I highly recommend having a rewritable card which you can add additional designs to stitch with your machine. I am using Criswell Embroidery Designs K-Lace Bookmarks for a 4x4 hoop

For our project today, we are using water soluble stabilizer as we are making a free-standing lace and I use 3 layers and place in my hoop  and stretch tautly


I used white Sulky Embroidery thread both in the upper and in the bobbin for extra stability. Embroidery thread has a sheen which gives a beautiful finish.

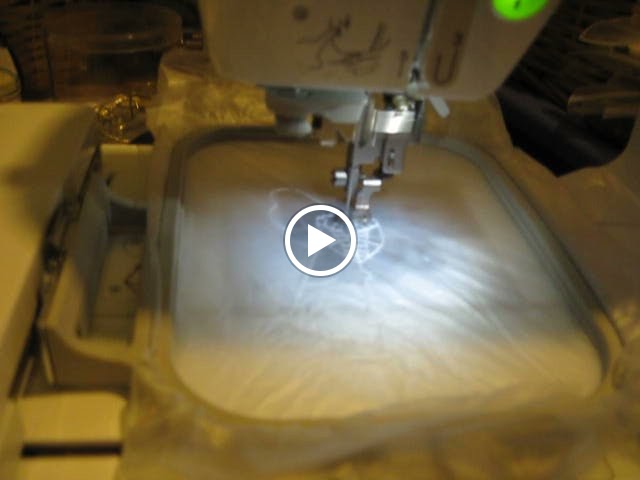
Once the stabilizer is in the hoop, the magic begins as the machine stitches all by itself!!!!


Once the stitching is complete, you need to trim the excess of the stabilizer away 


Are you ready for more magic??? This now goes into a dish pan or the sink where you run water over it to dissolve the stabilizer and leave your finished product!


All you need to do now, is let your design dry which I leave dry on a wash cloth. 


Once completely dry, trim the loose thread you see hanging there and add a thin ribbon or gold thread and you have completed a lace angel ornament in 15 minutes!!

Well, I hope you enjoyed my beautiful lace angel. If you have a questions or suggestions, please leave it in the comments. Also, you can join up to our Facebook group: Scrapbook Blessings Club for more fun, games, inspiration, tips and techniques. Thank you for stopping by and have a blessed day! SBC Design Team Member Lynne

Comments

  1. Just beautiful. I've resisted buying an embroidery machine for years. Now you've got me being tempted again.

    ReplyDelete

Post a Comment

We love comments! Please let us know what you think.

Popular posts from this blog

My Favorite Craft Tools and Giveaway!!!

Hi everyone, Today's video is a fun one for me. Since getting back into crafting I have noticed that I am pulling certain items over and over again and thought it would be fun to share with you. Two years ago, I took a step back from crafty and downsized 75% of my craft room.  However with just these awesome tools, I have been able to get back into the swing of things and I don't miss having a larger craft room. Personally, I feel every crafter should have these starting out.  They make creating easy and fun! Tools mentioned: Misti, Neehna Bright Cardstock, Distress Oxides, Ranger Dylusions die cut, In Love Art Shop word die cuts, ATG, Prismacolor Pencils, premade cards,Fiskars cutting blade and trimmer, Zig color pens, Wink Of Stella, Alcohol markers, t-ruler, Westcott 0 ruler, 6x6 paper pads, Versamark, EK Success powder tool, 3d Crystal Lacquer, Tombow adhesive, Momento/Hero Arts black ink, Cricut, Chameleon Black Pen, Pencil, Grid stamping block, etc. For the mont

MFP Stamp Shop June Blog Hop

Welcome to the MFP Stamp Shop June Blog Hop Let's get started!!!! This month's new Stamp Set Releases are: Featured  June 23 Paper Doll Chuck Featured  June 24   Paper Doll Chuck Formal and Hunting Featured  June 25  Background Diamonds and Flowers Featured  June 26 Pots and Vases 2 Please Hop along with us!! You have a chance to win one of these new stamp sets! Just comment on the following blogs ( don't forget this one ) each day for more chances to win! ( You do NOT need to comment on on all the blogs each day! The names are drawn randomly.) The winners will be announced on June 26, 2015 right here on the MFP Stamp Shop Blog. You can go back and comment if you missed a day. ( HINT: The more you comment the more chances you have to win. And comments on the MFP blog count twice. ) The deadline for commenting is Friday June 27, 2015 at 10:00 PM EST. Okay for this card, I went a different route. I thought with the holiday coming up, why not try to make Chuck's hunting ou

Building Block Graduation Card

Hello, everyone! Melissa here on to share a "building block" style card with you. I made this one graduation themed, since there are a ton of graduations going on right now. Hope you enjoy this card, and are inspired to try it out yourself. Here is the tutorial I followed from Split Coast Stampers. To make it easier, I will give you all the measurements, here. It looks harder than it is, I promise. Start with a piece of cardstock in your desired color that is 5.5 x 10.5. Put the 10.5 inch side along the top of your score board or paper trimmer, and score at 3.5 inches and 7 inches. Fold the first score line in a mountain fold, and the second in a valley fold. You should end up with a "z" fold card. The next part can get a bit tricky, so make sure you watch the video to fully understand what I am about to explain. On the back side of the "valley" fold, take a ruler and pencil and mark these measurements: 3/8 1 3/8 1 5/8 2 5/8 2 7/8 3 7/8