

Hey kids! Can you believe it's March 1st already?! I can't. I'm going to share some organization ideas with you today. The first one is for paper kits or small collections of paper and embellishments that all work together. I am lucky enough to have an extra bedroom in my house that is my craft room. And I recently cleaned out the closet and got it all in order. Phew, what a job. I should have taken a before picture. But, trust me-- it was bad. Over the years, I have gotten a few warehouse boxes of goodies and Santa sacks from October Afternoon. So, I went looking for big baggies to store things in. Found some at Target. 2 Gallon size. Life changing moment for sure!!! LOL!

And I bought clear skirt hangers at Target as well. They come in packs of 4 (I think they were just a little over a dollar a piece). And here's what I did :-)

 And here they are hanging in my closet. Nice and neat and dust free. I can just look through really quick and get what I need. Now that I can see what I have I'm using it all so much more. So happy!

And here is a pretty basic one. You've probably seen this before. Just in case you haven't. This is how I store my extra basic crafty supplies and some of my kids crafty stuff, too. It's really a shoe organizer. Got this at Target, too. Love the pink :-) And it just hooks over the door. Easiest DIY ever!


And I bought clear skirt hangers at Target as well. They come in packs of 4 (I think they were just a little over a dollar a piece). And here's what I did :-)
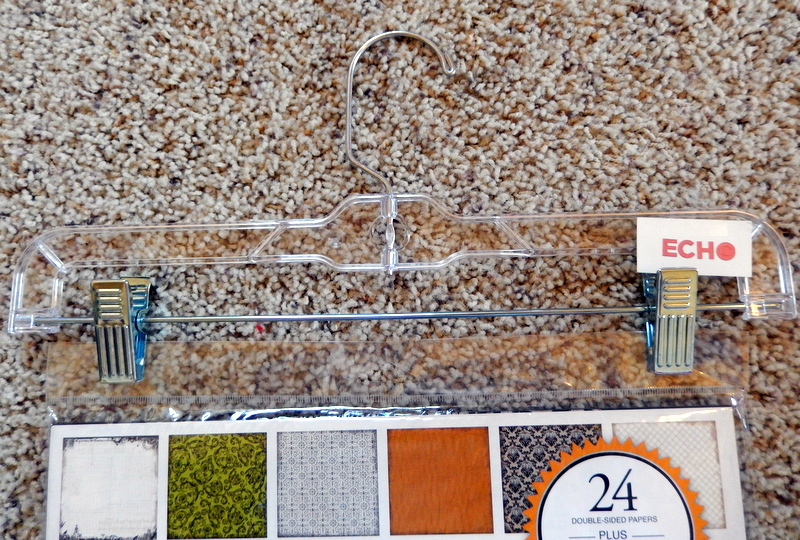
I put a label on the first hanger in each section to separate the brands.


And here is a pretty basic one. You've probably seen this before. Just in case you haven't. This is how I store my extra basic crafty supplies and some of my kids crafty stuff, too. It's really a shoe organizer. Got this at Target, too. Love the pink :-) And it just hooks over the door. Easiest DIY ever!

Well, I hope I've inspired you to get organized or given you some ideas. Thanks for stopping by today!
Cindy - In Love with PAPER
SBC Design Team Member
What an awesome idea!!! I have my scrap papers (bigger pieces) in Ziploc bags and sorted by category (masculine, feminine, etc)....they are taking up room on a shelf right now, but I like the idea of hanging them MUCH BETTER!!! That would make them eassier to see and to get to. Thank you so much for sharing this AWESOME and CREATIVE idea!!! :) Hugs...Janie
ReplyDelete