
Here is our Throwback Thursday Project...
Hey kids! It's Cindy for the Scrapbook Blessings Club blog today and I've got a fun glitter embossing technique to share with you.
TiP: Be sure and close your Versamark pad before applying the embossing powder.
Okay, grab the following supplies and let's get started :-)
Versamark pad
Embossing Tinsel (or you can use embossing pwd and glitter)
Heat tool
embossing folder
baby wipe

Steps:
1-open the embossing folder and generously apply Versamark to one side (I used the raised side and got glitter coverage on the background of the embossed image)
2- put your cardstock inside the embossing folder and run it through your Cuttlebug
3- apply your embossing tinsel (this has glitter right in it) or you can mix embossing powder with glitter about half and half ...should look like the photo below:

4- put excess embossing pwd back into the container. Clean your embossing folder with a baby wipe.
5- heat the embossing tinsel/pwd/glitter with your Heat tool until it turns darker and starts to sparkle.
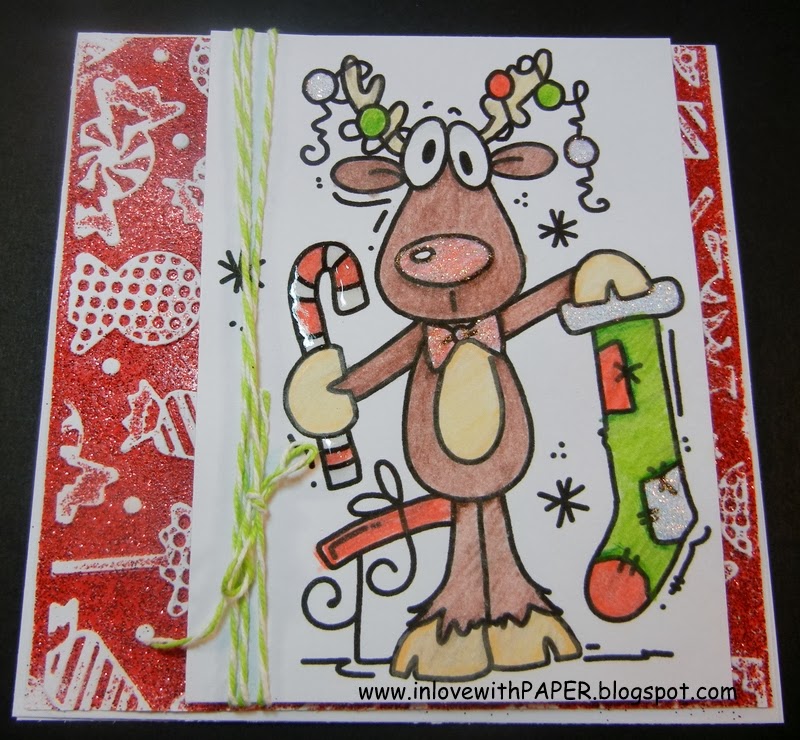
And here is the card I created with this glitter embossed background:
 Add'l info:
5" square cardbase in white
Bugaboo Digital image - Reindeer Christmas Goodies (They are having a sale-- 50% off all digital images until Dec 31st)
watercolor pencils
blender pen
Diamond Stickles
Glossy Accents - candy cane
Sew Easy floss in limeade
pop dots
PC embossing folder - Christmas set
Thanks for stopping by the SBC blog today! I hope I've inspired you to grab your embossing supplies and make something cool! I want to wish you and your family a Very Merry Christmas and a Happy, Healthy 2014!!
Have a blest day!
Cindy --- In Love with PAPER
I hope your enjoyed today's project too. If you have a questions or suggestions, please leave it in the comments. Also, you can join up to our Facebook group: Scrapbook Blessings Club for more fun, games, inspiration, tips and techniques. Thank you for stopping by and have a blessed day!
Hey kids! It's Cindy for the Scrapbook Blessings Club blog today and I've got a fun glitter embossing technique to share with you.
TiP: Be sure and close your Versamark pad before applying the embossing powder.
Okay, grab the following supplies and let's get started :-)
Versamark pad
Embossing Tinsel (or you can use embossing pwd and glitter)
Heat tool
embossing folder
baby wipe
Steps:
1-open the embossing folder and generously apply Versamark to one side (I used the raised side and got glitter coverage on the background of the embossed image)
2- put your cardstock inside the embossing folder and run it through your Cuttlebug
3- apply your embossing tinsel (this has glitter right in it) or you can mix embossing powder with glitter about half and half ...should look like the photo below:
I started with a white piece of cardstock. As you can see I missed a little spot with the Versamark...oops.
4- put excess embossing pwd back into the container. Clean your embossing folder with a baby wipe.
5- heat the embossing tinsel/pwd/glitter with your Heat tool until it turns darker and starts to sparkle.
And here is the card I created with this glitter embossed background:
5" square cardbase in white
Bugaboo Digital image - Reindeer Christmas Goodies (They are having a sale-- 50% off all digital images until Dec 31st)
watercolor pencils
blender pen
Diamond Stickles
Glossy Accents - candy cane
Sew Easy floss in limeade
pop dots
PC embossing folder - Christmas set
Thanks for stopping by the SBC blog today! I hope I've inspired you to grab your embossing supplies and make something cool! I want to wish you and your family a Very Merry Christmas and a Happy, Healthy 2014!!
Have a blest day!
Cindy --- In Love with PAPER
I hope your enjoyed today's project too. If you have a questions or suggestions, please leave it in the comments. Also, you can join up to our Facebook group: Scrapbook Blessings Club for more fun, games, inspiration, tips and techniques. Thank you for stopping by and have a blessed day!
What a fun technique! I wondered if I could mix glitter with embossing powder, so I may have to try that out!
ReplyDeleteWow, what a fabulous technique! I've never seen this before - the outcome looks amazing!
ReplyDelete