
Silhouette Knock-Out Technique

Hello, Friends!  Marilyn here with a technique that may be new to some of you.  Those who use it call it the knock-out technique.

Here is an example of what the knock-out technique looks like:

Silhouette Knock-Out Design Technique
To create my example, I first typed out the "Happy New Year" in black using a thick font (I used Impact).  The line spacing will need to be adjusted to make the lines closer to each other.

Then I typed 2015 in blue using the font Arial.  The colorful confetti was purchased and downloaded from the Silhouette store.

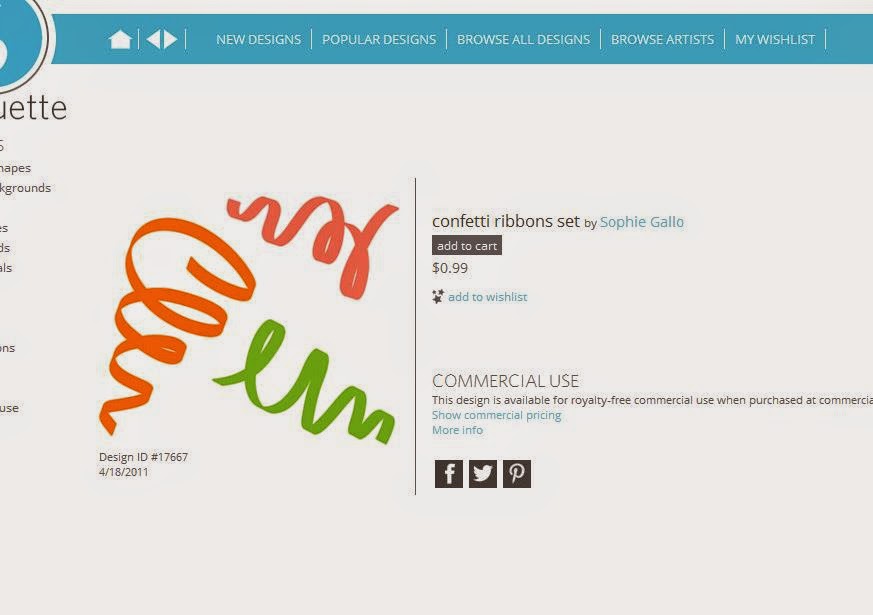
Design #17667 from Silhouette Store

I color filled the confetti and placed around the 2015 text.
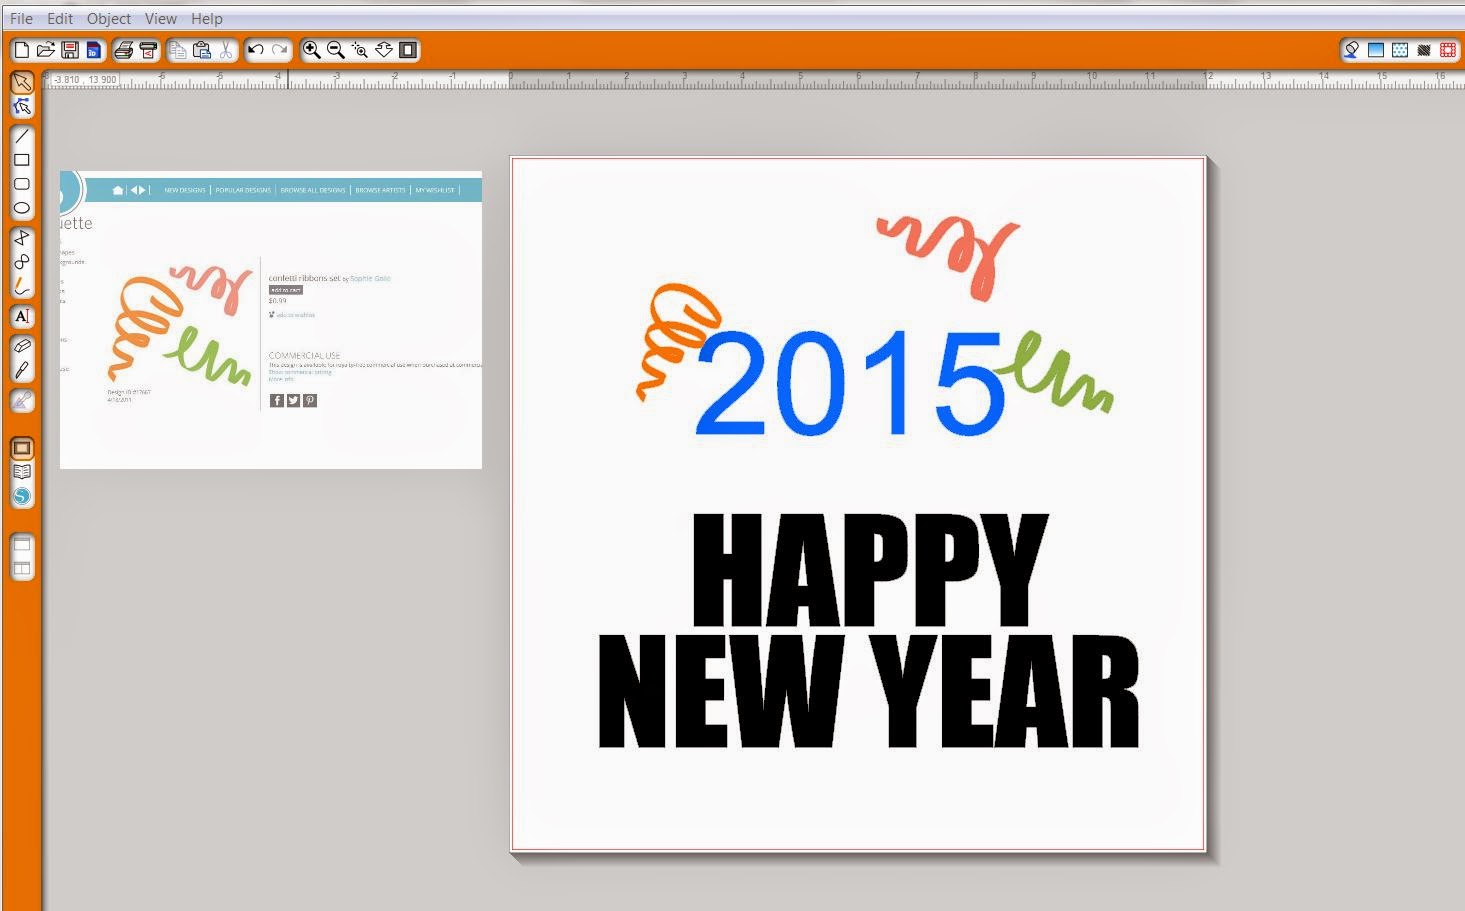
Step 1 - design 


Next place the 2015-confetti design on top of the Happy New Year text and duplicate - you'll need two copies of your design for this effect.

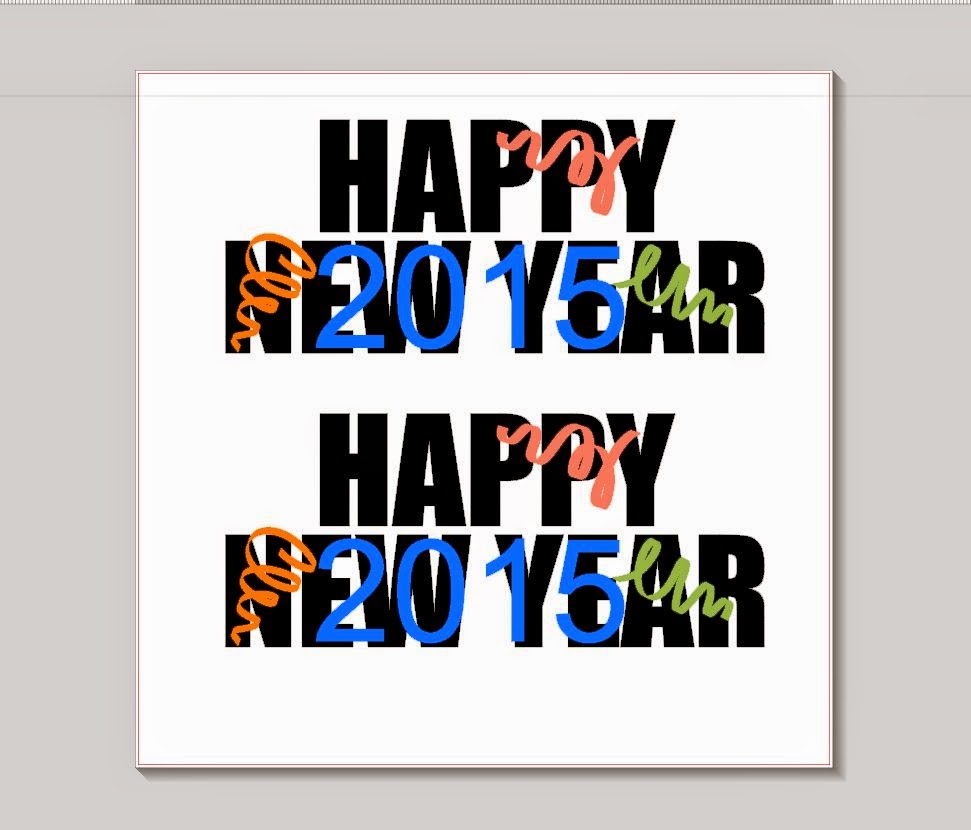
Step 2 - place 2015-confetti design on top of Happy New Year and create an extra copy.
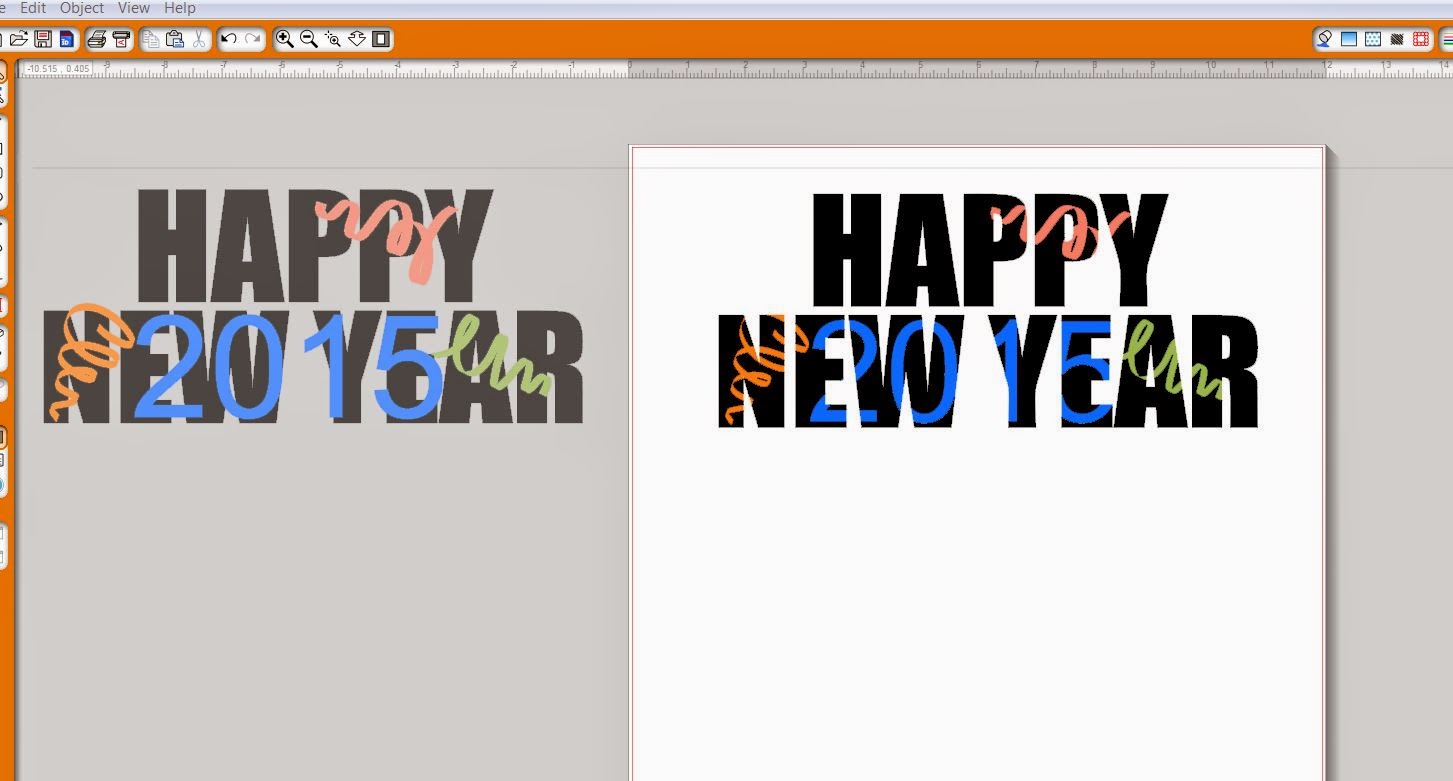
Highlight the top design and choose "crop".  You'll notice that your left over pieces are all black.  You'll need to group and color-fill the top design again.

Step 3 - crop the top design.  Recolor all the pieces and group.

Using your second copy, highlight and choose "subtract".  Regroup all the pieces once done.

Step 4 - subtract using the second copy.  Regroup once done.

Now place the top design on top of the bottom aligning in the blank spots.

Step 5 - align two designs on top of each other and group again.

Once aligned, you get your final knock-out design.

I used my knockout image to make a New Year's t-shirt.  But, you could also use it on a card or any other project.

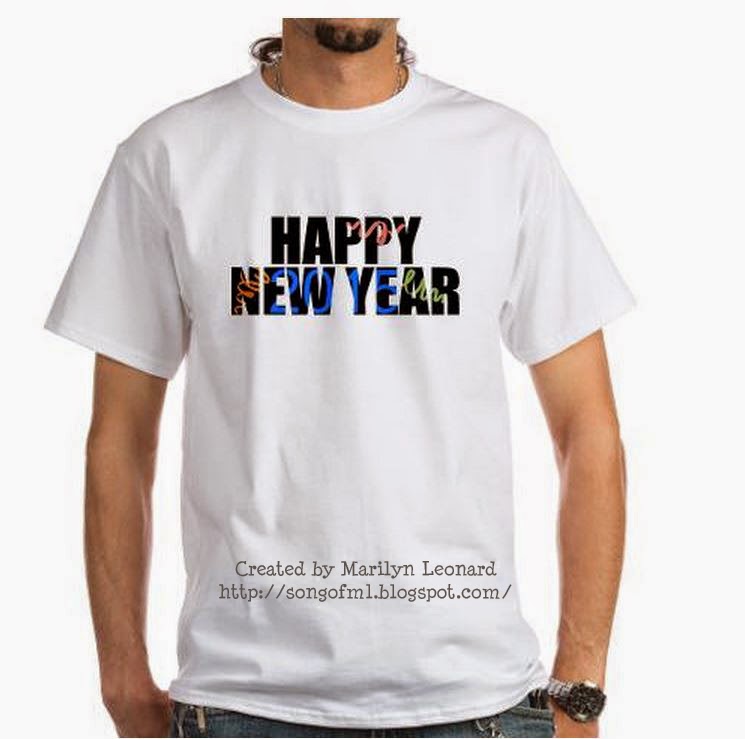
Knock-Out design applied to a t-shirt.


View blog post for supplies
I hope your enjoyed today's project too. If you have a questions or suggestions, please leave it in the comments. Also, you can join up to our Facebook group: Scrapbook Blessings Club for more fun, games, inspiration, tips and techniques. Thank you for stopping by and have a blessed day!

~ Marilyn
 SBC Design Team Member

Comments

  1. Great tutorial. Thank you. I tried it and it works!

    ReplyDelete
  2. @Charlotte C That is great, we would love to see a picture on in our Facebook Group!

    ReplyDelete

Post a Comment

We love comments! Please let us know what you think.

Popular posts from this blog

Building Block Graduation Card

Hello, everyone! Melissa here on to share a "building block" style card with you. I made this one graduation themed, since there are a ton of graduations going on right now. Hope you enjoy this card, and are inspired to try it out yourself. Here is the tutorial I followed from Split Coast Stampers. To make it easier, I will give you all the measurements, here. It looks harder than it is, I promise. Start with a piece of cardstock in your desired color that is 5.5 x 10.5. Put the 10.5 inch side along the top of your score board or paper trimmer, and score at 3.5 inches and 7 inches. Fold the first score line in a mountain fold, and the second in a valley fold. You should end up with a "z" fold card. The next part can get a bit tricky, so make sure you watch the video to fully understand what I am about to explain. On the back side of the "valley" fold, take a ruler and pencil and mark these measurements: 3/8 1 3/8 1 5/8 2 5/8 2 7/8 3 7/8 ...

My Favorite Craft Tools and Giveaway!!!

Hi everyone, Today's video is a fun one for me. Since getting back into crafting I have noticed that I am pulling certain items over and over again and thought it would be fun to share with you. Two years ago, I took a step back from crafty and downsized 75% of my craft room.  However with just these awesome tools, I have been able to get back into the swing of things and I don't miss having a larger craft room. Personally, I feel every crafter should have these starting out.  They make creating easy and fun! Tools mentioned: Misti, Neehna Bright Cardstock, Distress Oxides, Ranger Dylusions die cut, In Love Art Shop word die cuts, ATG, Prismacolor Pencils, premade cards,Fiskars cutting blade and trimmer, Zig color pens, Wink Of Stella, Alcohol markers, t-ruler, Westcott 0 ruler, 6x6 paper pads, Versamark, EK Success powder tool, 3d Crystal Lacquer, Tombow adhesive, Momento/Hero Arts black ink, Cricut, Chameleon Black Pen, Pencil, Grid stamping block, etc. For the mon...

Challenge #24 Anything Goes (featuring telescope cards)

  The prize for this challenge comes from: Stamp and Create ------------------------------------------------------------------------------------------------------------ Stamp and Create is giving away a $20.00 gift certificate for the winner of this new challenge. Stamp and Create  is an online store based in the US with shipping worldwide. We offer free shipping on orders over $55 within the US. We carry a wide variety of  stamp companies  including:  Magnolia ,  Saturated Canary ,  Wild Rose Studio ,  High Hopes Rubber Stamps ,  Make it Crafty ,  Wags 'n Whiskers  and many more. Plus we also carry  paper packs ,  ribbon , and  embellishments . We currently have many  Christmas designs  on Clearance at a great price.  The winner of this new challenge will receive a  $20.00 gift certificate   ...     .....Good Luck! ---------------------------------------------...