

Hey kids! It's Cindy for the SBC blog today. I'm sharing a cool cardbase tutorial. So grab your paper trimmer and scoring tools.
TiP: Save your skinny paper scraps, too. You'll need them on this one :-)

Steps:
1.) start with a 5 1/2" x 11" piece of cardstock
2.) 1" from the left- cut from 1" to 6 1/2"
3.) 4 1/2" from the left - cut from 1" to 6 1/2"
 Steps:
1.) from the left edge to the cut line, Score at 1", 2", 6 1/2"
2. ) from the other cut line (4 1/2" from left edge) Score at 1", 2", 6 1/2" from the cut line to the right edge
3. ) Score at 5 1/2" just between the cut lines
 Time to fold:
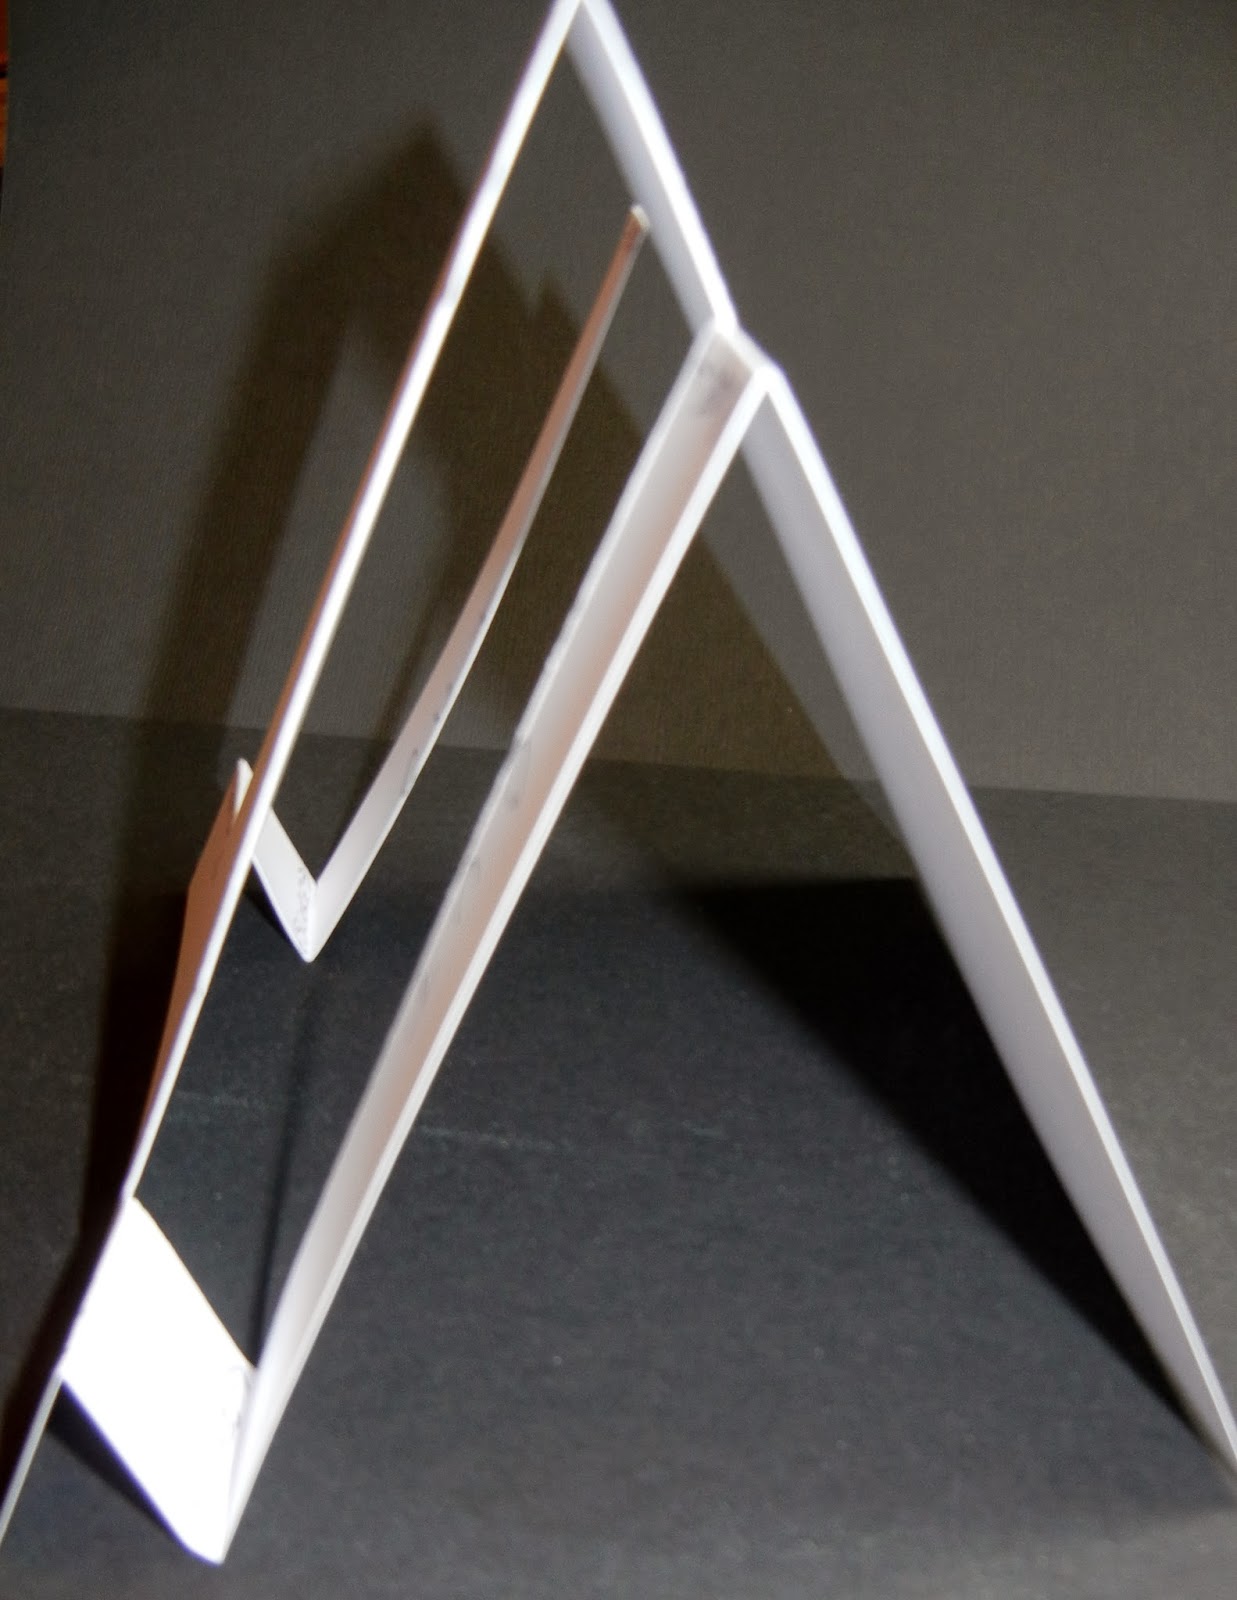
Start at the 1" score line and make a mountain fold, at the 2" make a valley fold, at the 5 1/2" another mountain, at the 6 1/2" another mountain. It should look like the one above.
 A side view.
Now the fun part-decorating it :-)
 Recipe:
The Paper Studio - Dec 25th stack
Snowflake CB embossing folder
Red grosgrain ribbon
Doodlebug Designs brad
Stamp - Mary Engelbrett
red bling
TC Dec 25th Cricut cart - joy @ 1 1/4"
I hope this tutorial made sense :-) Let me know if you have questions. If you'd like to see more of my work please visit In Love with PAPER.
I hope you have a blessed day and thanks for stopping by,
Cindy---

TiP: Save your skinny paper scraps, too. You'll need them on this one :-)

Steps:
1.) start with a 5 1/2" x 11" piece of cardstock
2.) 1" from the left- cut from 1" to 6 1/2"
3.) 4 1/2" from the left - cut from 1" to 6 1/2"

1.) from the left edge to the cut line, Score at 1", 2", 6 1/2"
2. ) from the other cut line (4 1/2" from left edge) Score at 1", 2", 6 1/2" from the cut line to the right edge
3. ) Score at 5 1/2" just between the cut lines

Start at the 1" score line and make a mountain fold, at the 2" make a valley fold, at the 5 1/2" another mountain, at the 6 1/2" another mountain. It should look like the one above.
Now the fun part-decorating it :-)

The Paper Studio - Dec 25th stack
Snowflake CB embossing folder
Red grosgrain ribbon
Doodlebug Designs brad
Stamp - Mary Engelbrett
red bling
TC Dec 25th Cricut cart - joy @ 1 1/4"
I hope this tutorial made sense :-) Let me know if you have questions. If you'd like to see more of my work please visit In Love with PAPER.
I hope you have a blessed day and thanks for stopping by,
Cindy---
What a neat card fold - I need to try this. Thank you for the great instructions and photos, too! ~ Marilyn
ReplyDeleteVery cool card!!
ReplyDeleteBeautiful Card
ReplyDelete