
I love being off on Fridays! I can just scrap til my little heart is content, wellllll, until the kiddos start whining that they have to eat, lol!
Here are the cards that I did today from some of my favor challenge blogs...
--------------------------------------------------------------------------------------------------------
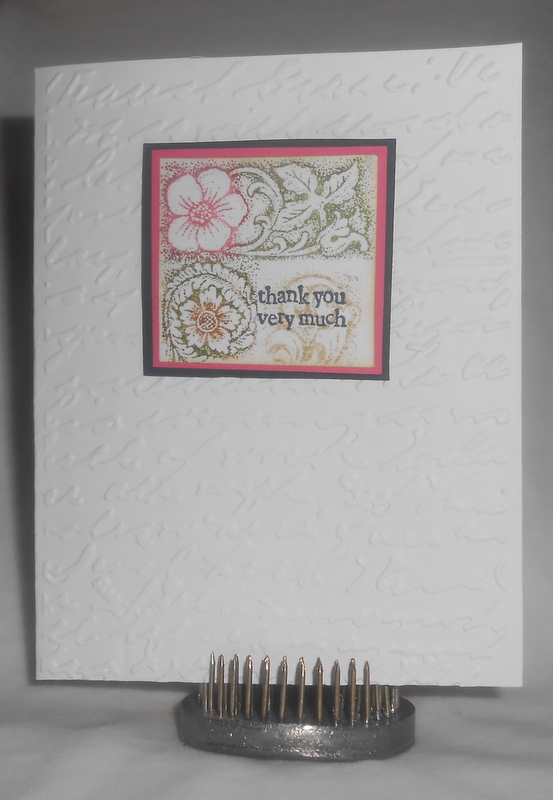
This card was fun to make. I used 3 different Stampin Up Stamps and Tim Holtz Distress markers. I love color stamps with those markers. Just remember they work better on rubber and pill/bead up on clear stamps.
Challenge:
CAS(E) this Sketch!
 ------------------------------------------------------------------------------------------------------------
This was an easy card. I just got Lacy Label Lite Cartridge and LOOOOOVE IT!!!! Finally, I have a great cart that reminds me of those cute spellbinders dies.
Challenge:
Seize the Birthday- masculine
 ------------------------------------------------------------------------------------------------------------
Love my embosser and it got a good work out here! I glue down my button flowers and then ran the whole card through with the Swiss Dot folder.
Challenges:
CASology- circles
Clean & Simple- sketch
Die Cutting Divas- embossing, 3 pp, buttons (used Lacey Label cart)
 ------------------------------------------------------------------------------------------------------------
Bonus card, I needed to make a masculine St Pat card so I used Clean and Simple's last wk design
 ------------------------------------------------------------------------------------------------------------
yep....my new obsession....wobble cards!!!!
 I think this is a cute digi stamp, I am pretty sure it is a Beccy's stamp but I need to look it up in my files.
Challenge:
Action Wobble- make your own background
 ------------------------------------------------------------------------------------------------------------
And lastly!!! My favorite card of the day! I got the inspiration from a new for challenge blog. I am amazed at the cards on this blog! Die for a Sketch!
Challenges:
Die for a Sketch
Celebrate the Occasion- girl bday/pink

Hope you have a blessed day and thanks for stopping by,
Here are the cards that I did today from some of my favor challenge blogs...
--------------------------------------------------------------------------------------------------------
This card was fun to make. I used 3 different Stampin Up Stamps and Tim Holtz Distress markers. I love color stamps with those markers. Just remember they work better on rubber and pill/bead up on clear stamps.
Challenge:
CAS(E) this Sketch!
This was an easy card. I just got Lacy Label Lite Cartridge and LOOOOOVE IT!!!! Finally, I have a great cart that reminds me of those cute spellbinders dies.
Challenge:
Seize the Birthday- masculine

Love my embosser and it got a good work out here! I glue down my button flowers and then ran the whole card through with the Swiss Dot folder.
Challenges:
CASology- circles
Clean & Simple- sketch
Die Cutting Divas- embossing, 3 pp, buttons (used Lacey Label cart)

Bonus card, I needed to make a masculine St Pat card so I used Clean and Simple's last wk design

yep....my new obsession....wobble cards!!!!

Challenge:
Action Wobble- make your own background

And lastly!!! My favorite card of the day! I got the inspiration from a new for challenge blog. I am amazed at the cards on this blog! Die for a Sketch!
Challenges:
Die for a Sketch
Celebrate the Occasion- girl bday/pink

Hope you have a blessed day and thanks for stopping by,
Lovely card and all the pink! Really love that image. Thankf for joining us at a Die for A Sketch. Willie
ReplyDeleteI love your take on the Sketch, your choice of colours is great, and I love all your lovely details. Thank you for sharing at A Die For A Sketch this month. Hope you will join us again next month, we have another great Sketch. Good luck with the Challenge. Judy x
ReplyDeleteSandy!! I'm so happy you've joined in on the fun at A Die for a Sketch! I love to see my friends link up...thanks so much! I hope you join us again for the next challenge!...Nancy :o)
ReplyDeleteBeautiful card, and the image is so cute. Great job !! Thanks for joining us at a Die for a Sketch. Hope to see you next time too. Ilonka DT :)
ReplyDeleteWow! You've had a productive day! I love the rainbow of bright colours you've used. I love that you combined the four elements of the CTS sketch into one and all the sparkle on your CASology card! Thanks so much for playing along with CASology and CAS(E) This Sketch this week!
ReplyDeleteVery sweet princess card! She will be loved. Thank you for joining us at a Die for a Sketch.
ReplyDeletehugs kelly
a really lovely set of cards... your CASology card is so fun!! thanks for playing along with CASology this week!
ReplyDeleteYou rocked the challenge. The thanks and the three circles sure make for a pretty card. I love your spinner card to, very nice to get a bonus and see three more cards
ReplyDeleteThank you for joining the Die cuttin’ divas
Tic-tac-toe challenge
Guest Designer DCD
DIANA L.
http://dianamlarson.blogspot.com
You were seriously busy! I haven't tried a wobble spring yet but it looks like a fun addition to a card! Glad you joined in on the fun this week at CASology!
ReplyDeleteOh my you have sure been busy! Your cards are all just amazing! Great work!! Thanks so much for joining us at Seize The Birthday this week! :)
ReplyDeleteYour flower card is very pretty! Thanks for entering it at Die Cuttin' Divas challenge this week.
ReplyDeleteA lovely princess card...................love the colors and the sweet image!
ReplyDeleteThanks for joining us at a Die for a Sketch!
Hugs, Gaby
Oh, my goodness, you HAVE been busy! I love all your cards, and especially the glittery sweetness on your circle card for CASology! Thanks for playing along this week!
ReplyDeleteLove the sparkle on your princess! Thank you for sharing with us at CTO!
ReplyDeleteGreat way to use the sketch! Thanks for joining us at Seize the Birthday!
ReplyDeleteawesome cards!!!! So glad you joined us on Seize the Birthday
ReplyDeleteWhat a clever way to interpret the sketch with the stamped images, love the images :) Thanks for playing this week at CAS(E) this Sketch!
ReplyDeleteWell done - I hope you'll link up at 52 Card Pickup this week!
ReplyDeletehttp://www.oldbackporch.com/2013/03/52-card-pickup-210.html