
SFL Flavor of the Month July Card Kit: Birthday Bash!


A Birthday Bash in July!
Who doesn’t need birthday cards? Those seem to be the absolute most type of cards I need. This month’s card kit is jam packed with great brands, fabulous stamps, and some awesome embellishments to make all those birthday cards you need. Maybe you can even make enough for the rest of the year! Join along as the Design Team wows you with all the awesome creations they have for you sharing this fabulous kit! 

Check out the Flavor of the Month Page and be sure to get your kit early!

YAY!!!!! HAPPY BIRTHDAY TO YOU!!!!!
or belated birthday if you are like me and already had yours :)

So if you haven't got it yet, this month's flavor is BIRTHDAYS!
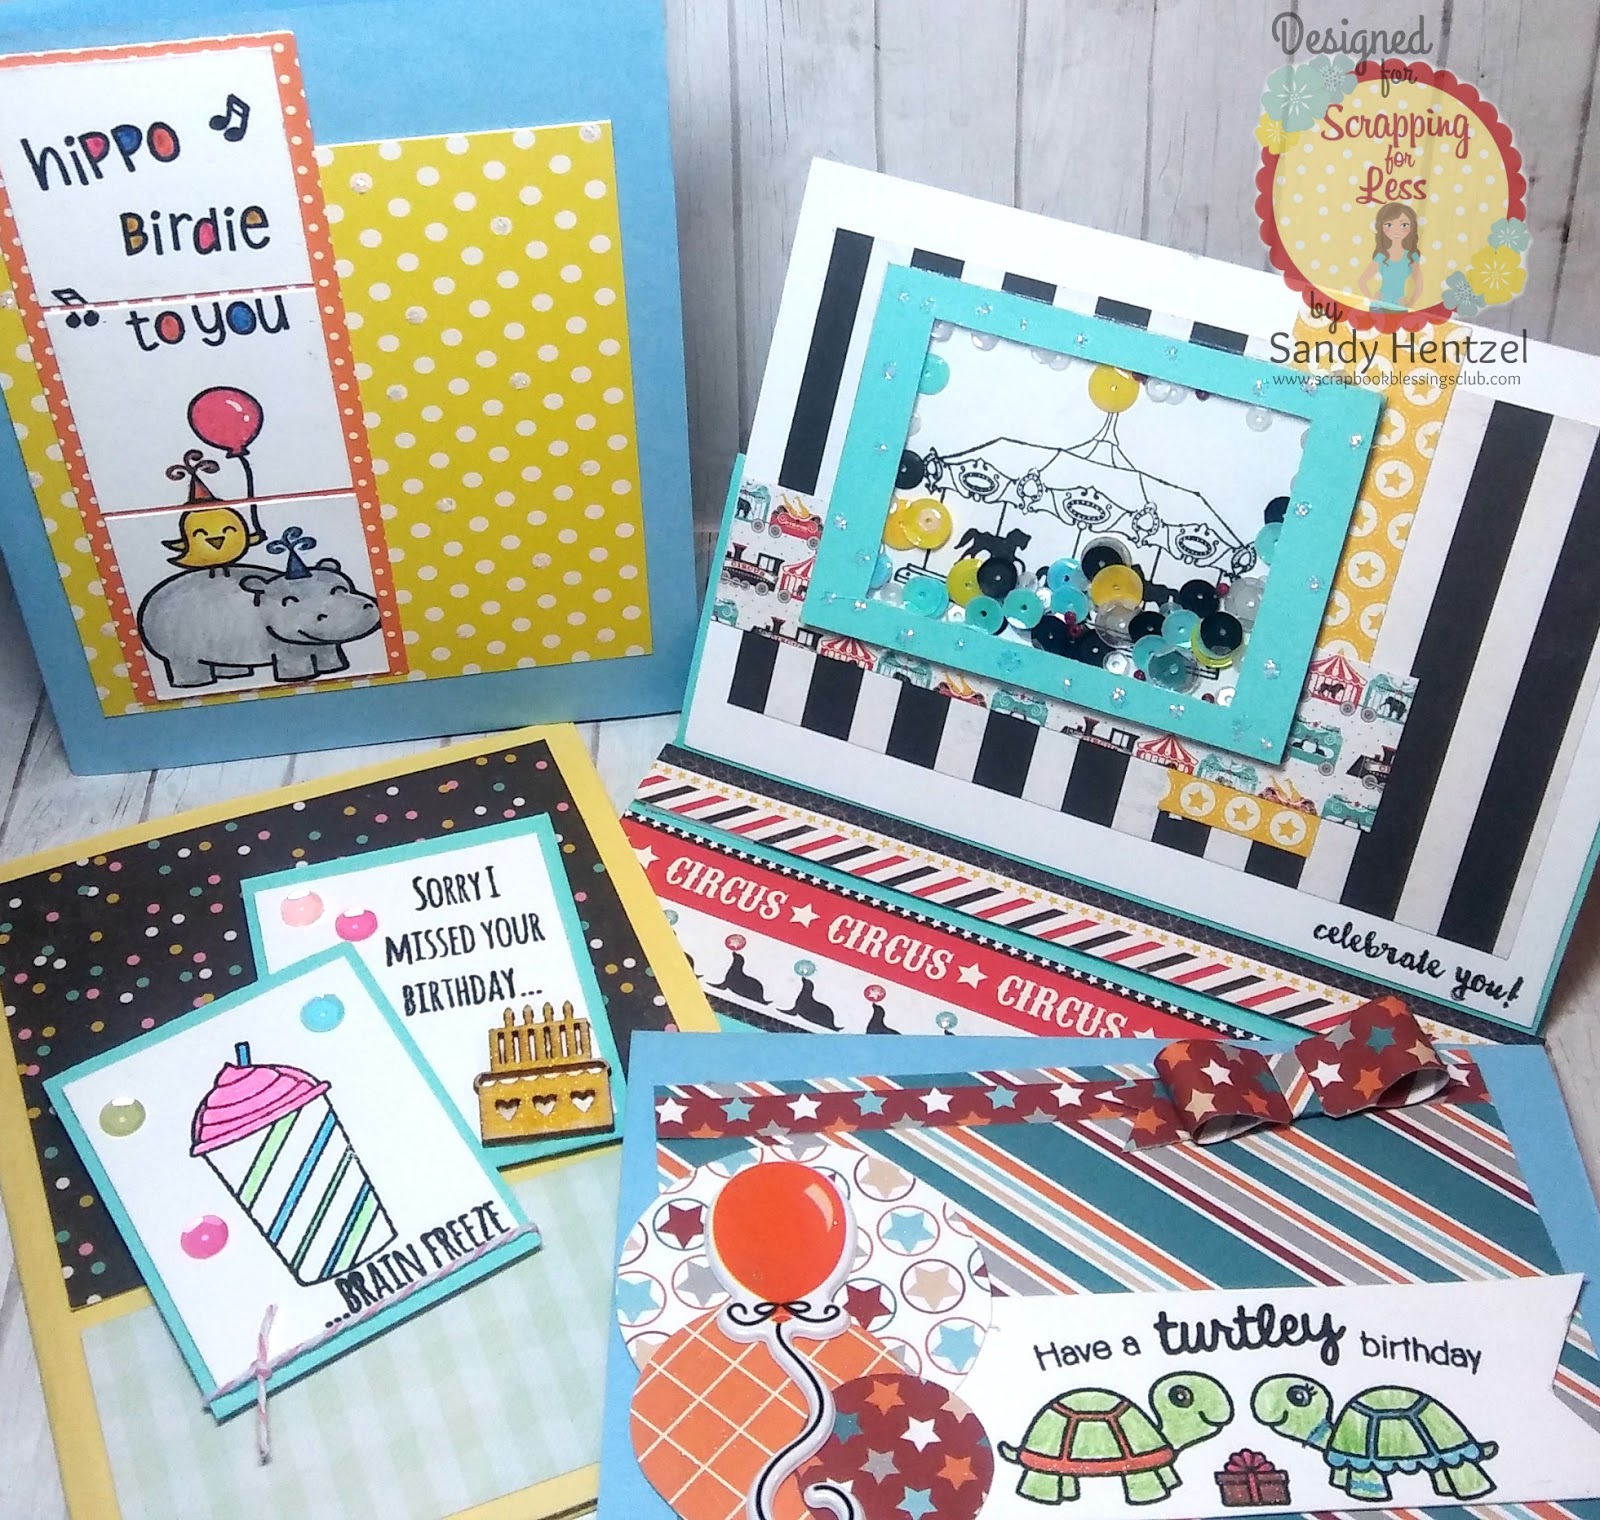
Here are my 4 cards that I did using the 
 which includes all 4 stamps, papers sets and various coordinating embellishments. All you need for this kit is adhesive, your paper trimmer and stamp ink/ coloring medium for the cute stamps.

1) Shaker Easel Card- BAM, a 2 for 1 card!

2) The cute homemade Bow card

3) Brain Freeze?!?! How can you not love that?!

4) These guys are so stinkin cute I can scream... Hippo Birdie!!!!

How can you not love all these stamps, embellishments and papers in 
July's Flavor of the Month Kit?!?!

UP NEXT IS KIM. We saved the best for last!
Just click her name below!
Blog Hop Line Up:
Scrapping For Less

Comments

  1. These cards are just too cute. I am in love with the easel fold one!!!

    ReplyDelete
  2. Sandy! These are ADORABLE!!! Your easel card is SOOOO cute!!! Great job!

    ReplyDelete
  3. Sandy, these cards are so cute, I'm especially loving the shaker easel card, it's definitely my favorite design!

    ReplyDelete
  4. These cards are adorable! Love the ease shaker!

    ReplyDelete
  5. That shaker easel card is adorable!

    ReplyDelete
  6. Love shaker cards! Such great designs and inspiration.

    ReplyDelete
  7. Wonderful and fun Cards!! Love all of them!! Fantastic Job:)

    ReplyDelete
  8. Great cards. You did a fantastic job!!

    ReplyDelete
  9. I love the carousel shaker card, what a great idea.

    ReplyDelete
  10. Awesome cards! I am in love with your carousel card!

    ReplyDelete
  11. Too cute... love the hippo birdie one! I also own the turtle set and think it is SO cute!! :)

    ReplyDelete

Post a Comment

We love comments! Please let us know what you think.

Popular posts from this blog

My Favorite Craft Tools and Giveaway!!!

Hi everyone, Today's video is a fun one for me. Since getting back into crafting I have noticed that I am pulling certain items over and over again and thought it would be fun to share with you. Two years ago, I took a step back from crafty and downsized 75% of my craft room.  However with just these awesome tools, I have been able to get back into the swing of things and I don't miss having a larger craft room. Personally, I feel every crafter should have these starting out.  They make creating easy and fun! Tools mentioned: Misti, Neehna Bright Cardstock, Distress Oxides, Ranger Dylusions die cut, In Love Art Shop word die cuts, ATG, Prismacolor Pencils, premade cards,Fiskars cutting blade and trimmer, Zig color pens, Wink Of Stella, Alcohol markers, t-ruler, Westcott 0 ruler, 6x6 paper pads, Versamark, EK Success powder tool, 3d Crystal Lacquer, Tombow adhesive, Momento/Hero Arts black ink, Cricut, Chameleon Black Pen, Pencil, Grid stamping block, etc. For the mont

Building Block Graduation Card

Hello, everyone! Melissa here on to share a "building block" style card with you. I made this one graduation themed, since there are a ton of graduations going on right now. Hope you enjoy this card, and are inspired to try it out yourself. Here is the tutorial I followed from Split Coast Stampers. To make it easier, I will give you all the measurements, here. It looks harder than it is, I promise. Start with a piece of cardstock in your desired color that is 5.5 x 10.5. Put the 10.5 inch side along the top of your score board or paper trimmer, and score at 3.5 inches and 7 inches. Fold the first score line in a mountain fold, and the second in a valley fold. You should end up with a "z" fold card. The next part can get a bit tricky, so make sure you watch the video to fully understand what I am about to explain. On the back side of the "valley" fold, take a ruler and pencil and mark these measurements: 3/8 1 3/8 1 5/8 2 5/8 2 7/8 3 7/8

Independence Day Blog Tour

HAPPY 234th BIRTHDAY AMERICA!!!! To celebrate, I am participating in Operation Write Home BLOG TOUR.  Just click  HERE if you want to go on the tour with me! Of course the theme is... RED, WHITE and BLUE BIRTHDAY!   Here are my cards... If you would love to have these cute digi stamps, just head to OWH Stars and Stripes . They are all on here for free! I'll be doing a random drawing for some Birthday prizes. I haven't decided how many yet so all you have to do is leave a comment here.  If you are or become a follower, leave a second comment for another chance to win! For these cards, I used... Red/ white card stock and blue pp Silver Stickles Copics: red (R29),blue (B05), brown (E08)  For accent colors, I used my color pencils Scrappy Cat-  firework acrylic stamps and of course DIGI STAMPS!!! (my new found love, lol)