
Hi!!! It's Lynne from the Scrapbook Blessings Club, offering an organizational tip for keeping your projects for various Design Teams organized. This year I am on 12 Design Teams and after I thought what have I gotten myself into I thought I would organize my time and to get my projects completed in a timely fashion . . .
The first thing I did was organize a spread sheet with each of the Design Teams I'm on on the side with the top parts of the table open to put dates

The top cells are to put the dates projects are due with the projects then placed in the respectful boxes. If you notice, I also had put the time when the projects are to be live SEW, I know what I'm doing and when and where to organize my time wisely!!!
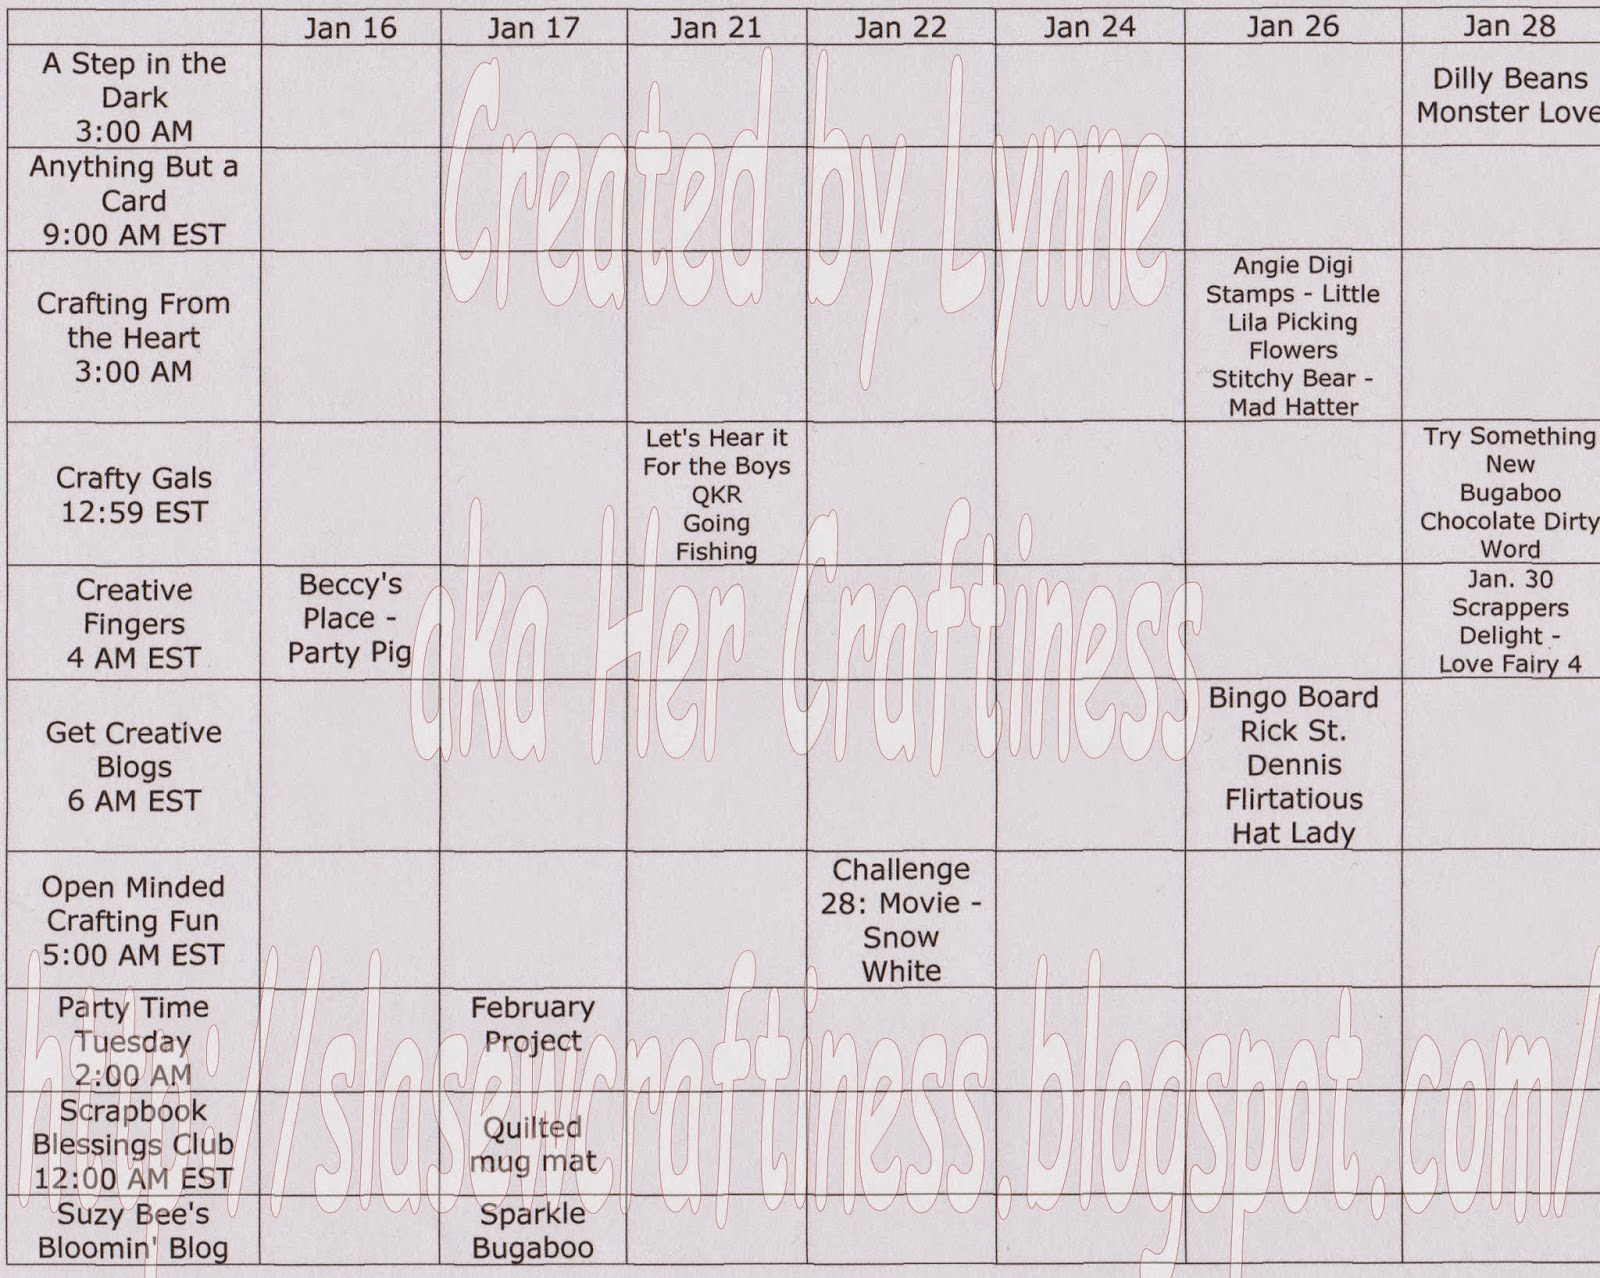
Viola!!! I have a timeline when my DT projects are due and what the image is along if there is a theme. This is then printed and under my mat that I can see at all times.
Now, if you notice that I had printed out the digital images and hand-printed what the image is, the due date along with which Design Team it is for . . . . these are all clipped together and ready- set- color and then create!!!
DISCLAIMER: Due to the angel policy, I have watermarked these to protect the designer and the pictures are not that clear.


The first thing I did was organize a spread sheet with each of the Design Teams I'm on on the side with the top parts of the table open to put dates
The top cells are to put the dates projects are due with the projects then placed in the respectful boxes. If you notice, I also had put the time when the projects are to be live SEW, I know what I'm doing and when and where to organize my time wisely!!!
Viola!!! I have a timeline when my DT projects are due and what the image is along if there is a theme. This is then printed and under my mat that I can see at all times.
Now, if you notice that I had printed out the digital images and hand-printed what the image is, the due date along with which Design Team it is for . . . . these are all clipped together and ready- set- color and then create!!!
DISCLAIMER: Due to the angel policy, I have watermarked these to protect the designer and the pictures are not that clear.
I hope your enjoyed today's project too. If you have a questions or suggestions, please leave it in the comments. Also, you can join up to our Facebook group: Scrapbook Blessings Club for more fun, games, inspiration, tips and techniques.
Thank you for stopping by and have a blessed day!
SBC Design Team Member
Wonderful idea!
ReplyDeletethis is such a nice kind of blog and its stuffs are too top. I clearly admire your submit and also like it very a whole lot. desirable process and hold it up. Thanks for sharing. Spiderman Black Vest Topcelebsjackets
ReplyDeleteAs such, they allow us to communicate and share with our living family, while at the same time allowing us to be known by generations to come
ReplyDeleteLove book.
HARDCORE CYCLES was started in the Greater Philadelphia area by a group of tight friends with a passion for V-Twin performance aftermarket parts.Visit our Website Thanks
ReplyDeleteLA Choppers Bottle Cap Choke Cable Knob
Hi i,am Selling Various types of Jacket Varsity,Leather,Wool,Fleece with best fitting and better quality. Visit My Website To Order. Thanks
ReplyDeleteCruiser Street Leather Jacket
Half Black Half White Jacket
Health is more important in our life other then any thing, all we should care about the health, weight lose is very important factor on weight lose we all need to take care of our weight.
ReplyDeleteinteresting facts about weight loss
facts about drinking water and weight
We introduce bomber jackets in united state with primium quality leather used in making leather jackets visit BomberJackets.US
ReplyDeleteRaulde Painting Kit allows you to paint anywhere in your house without any hassle.
ReplyDeleteProfessional Roller & Extendable Pole – 9in