
Making a Scene Using Your Stamps and Watercoloring Process

Hello everyone! Welcome back to SBC! I'm Katelyn and I've got a new tutorial to share with you! I started doing this with some of my stamp sets recently and after having enough practice I decided to share with you this easy technique to extend the mileage on your stamps. I have two stamps here that I purchased off of Etsy. They are not necessarily intended to go together, but since the illustration style was the same, I figured I would make a full scene out of them. Some other supplies you will need for this project include stamps that "go" together, a fine tip black pen (or whatever color you're stamping in), a watercolor set, and a fine tip brush. Let's dive in to more details about the process.


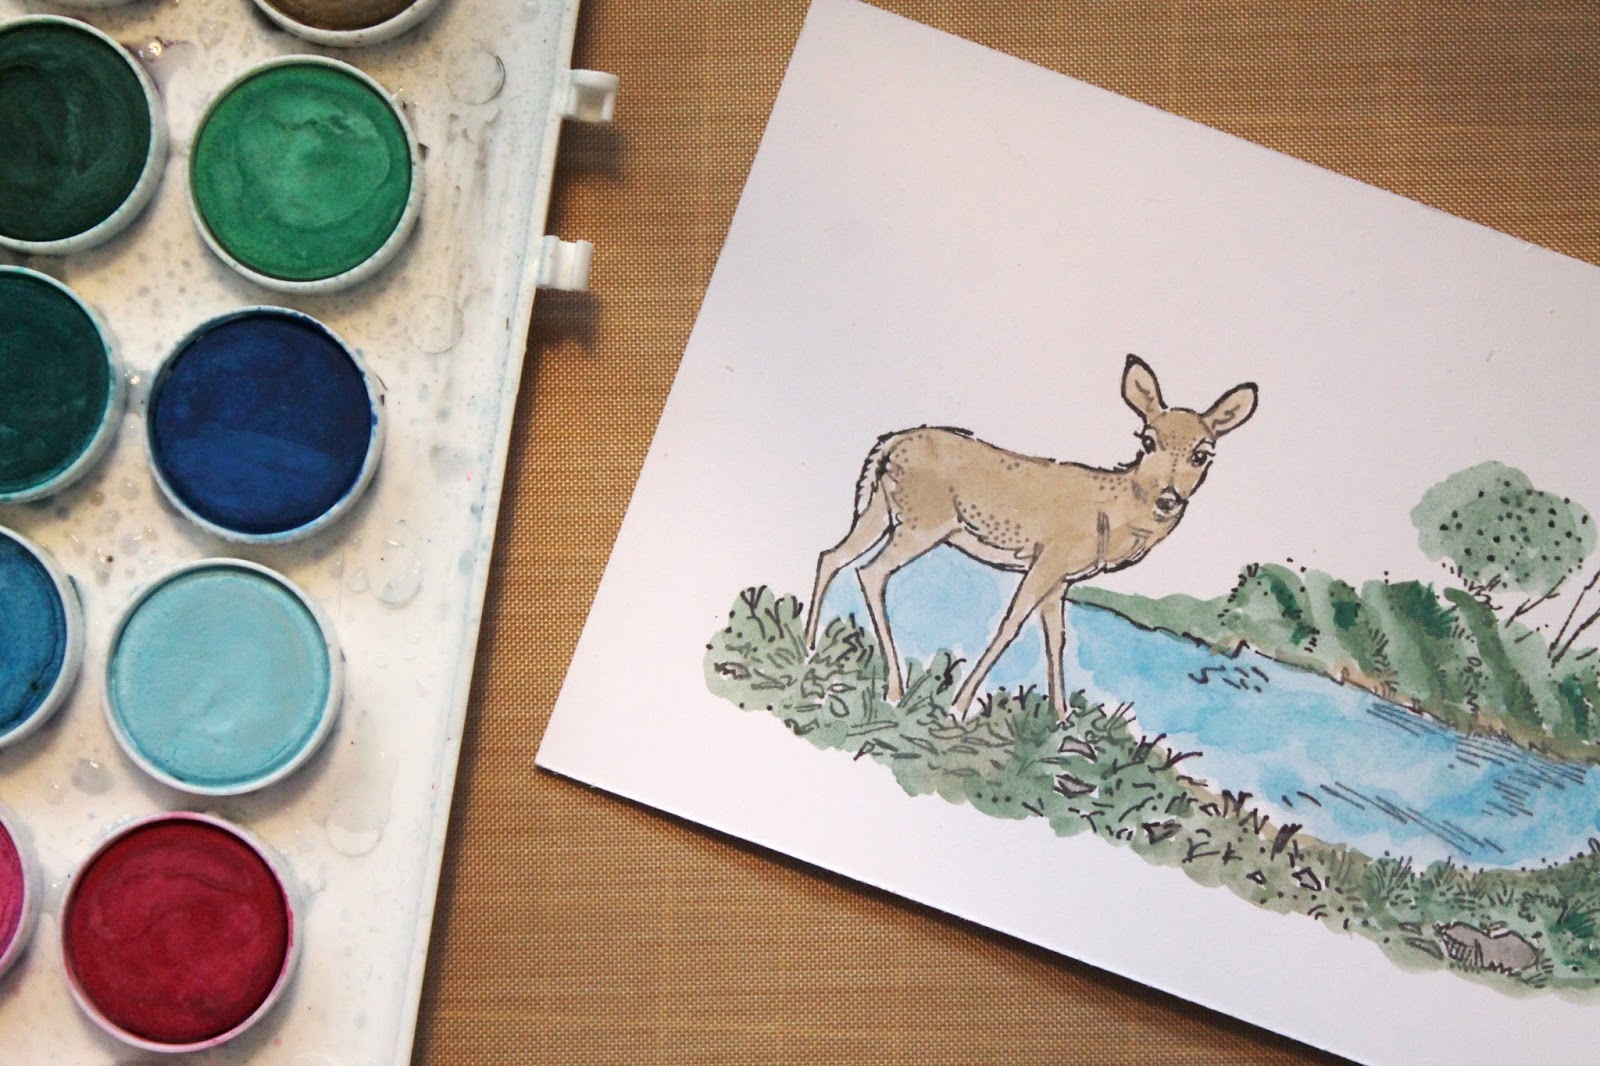
Essentially, what we're doing is taking two stamps and filling in the gaps. The video gives a better representation of how this occurs, but I basically mimic what is around the already stamped image. The grass section tends to be the easiest since it is essentially a free for all. You can include rocks, dots, blades of grass, mounds of dirt, or whatever else your heart pleases. The key here is to also add stuff over/with the already stamped image. You'll see in my video tutorial that I will add extra grass and dots underneath the deer and in the forest. This helps integrate your new designs with the existing stamp set. Once all of the drawing is done we get to watercolor! I think this technique is particularly great with landscapes like this one.


As you saw in the tutorial, I mixed several different shade of browns, blues, and greens to complete my image. I took the direct colors and used them to fill in various spots of my piece. Watercolor isn't supposed to be neat and tidy, so if your brown bleeds into your green a tiny bit that's okay.


I hope you enjoyed this landscape illustration tutorial! I think this is really fun and you are able to customize your own scenes. If you have any questions, please leave them in the comments and I would be happy to answer them! Thanks for stopping by!

Comments

Popular posts from this blog

In Love Art Shop- Show and Tell video 3

Hi everyone, I have my second video for In Love Art Shop done.  It was so much fun making these cards with easy to use stamps and wafer thin metals dies.  Here are the cards that are featured in this video along with the products I used from In Love Art Shop. Discount 15% FFSandy Please click on my affiliate link to shop: http://lddy.no/ae9w Discount: FREE SHIPPING on Orders of $25.00!!!! Product links- Floral wreaths: https://tinyurl.com/y3b8o5c6 Sentiment dies: https://tinyurl.com/y25ohd2q Word Stamps: https://tinyurl.com/yxqfee2u Cupcake: https://tinyurl.com/y3969jf8 Lace Rose oval: https://tinyurl.com/y6x8ye53 Oil painting flower stamp: https://tinyurl.com/yxvy9ybg                

Building Block Graduation Card

Hello, everyone! Melissa here on to share a "building block" style card with you. I made this one graduation themed, since there are a ton of graduations going on right now. Hope you enjoy this card, and are inspired to try it out yourself. Here is the tutorial I followed from Split Coast Stampers. To make it easier, I will give you all the measurements, here. It looks harder than it is, I promise. Start with a piece of cardstock in your desired color that is 5.5 x 10.5. Put the 10.5 inch side along the top of your score board or paper trimmer, and score at 3.5 inches and 7 inches. Fold the first score line in a mountain fold, and the second in a valley fold. You should end up with a "z" fold card. The next part can get a bit tricky, so make sure you watch the video to fully understand what I am about to explain. On the back side of the "valley" fold, take a ruler and pencil and mark these measurements: 3/8 1 3/8 1 5/8 2 5/8 2 7/8 3 7/8 ...

Oldies But Goodies Blog Hop- Day 1 (Water Coloring)

Welcome to our Oldies But Goodies Blog Hop! We'll be featuring many of our older but still fabulous stamp sets during the hop! Each day we will have a tutorial and samples for your inspiration. Follow along from April 22-24 for your chance to win the Oldie But Good  Stamp set of YOUR CHOICE. One winner will be chosen. Just leave a comment. Each day you can leave a comment on each blog to increase your chance of winning! April 22- Flowers With Watercolors April 23-Stand By Your Man Explosion Card April 24-Holidays Candy Holder Today's Tutorial is by Thrifty. You can find it here.    So last but not least (I hope, lol)! We have seen some awesome water coloring projects. For my stamped image, I am using Tim Holtz Distress Markers.  I did this tech earlier in the month for MFPS new Stamp Release Blog Hop. So here are my water color flowers, well...actually, my water color image, bunny included.  This is soooo easy to color without taking all the time for blending an...