
The prize for this challenge comes from:

DRS Designs is giving away a $10.00 gift certificate
to the winner of this new challenge.
.....Good Luck!
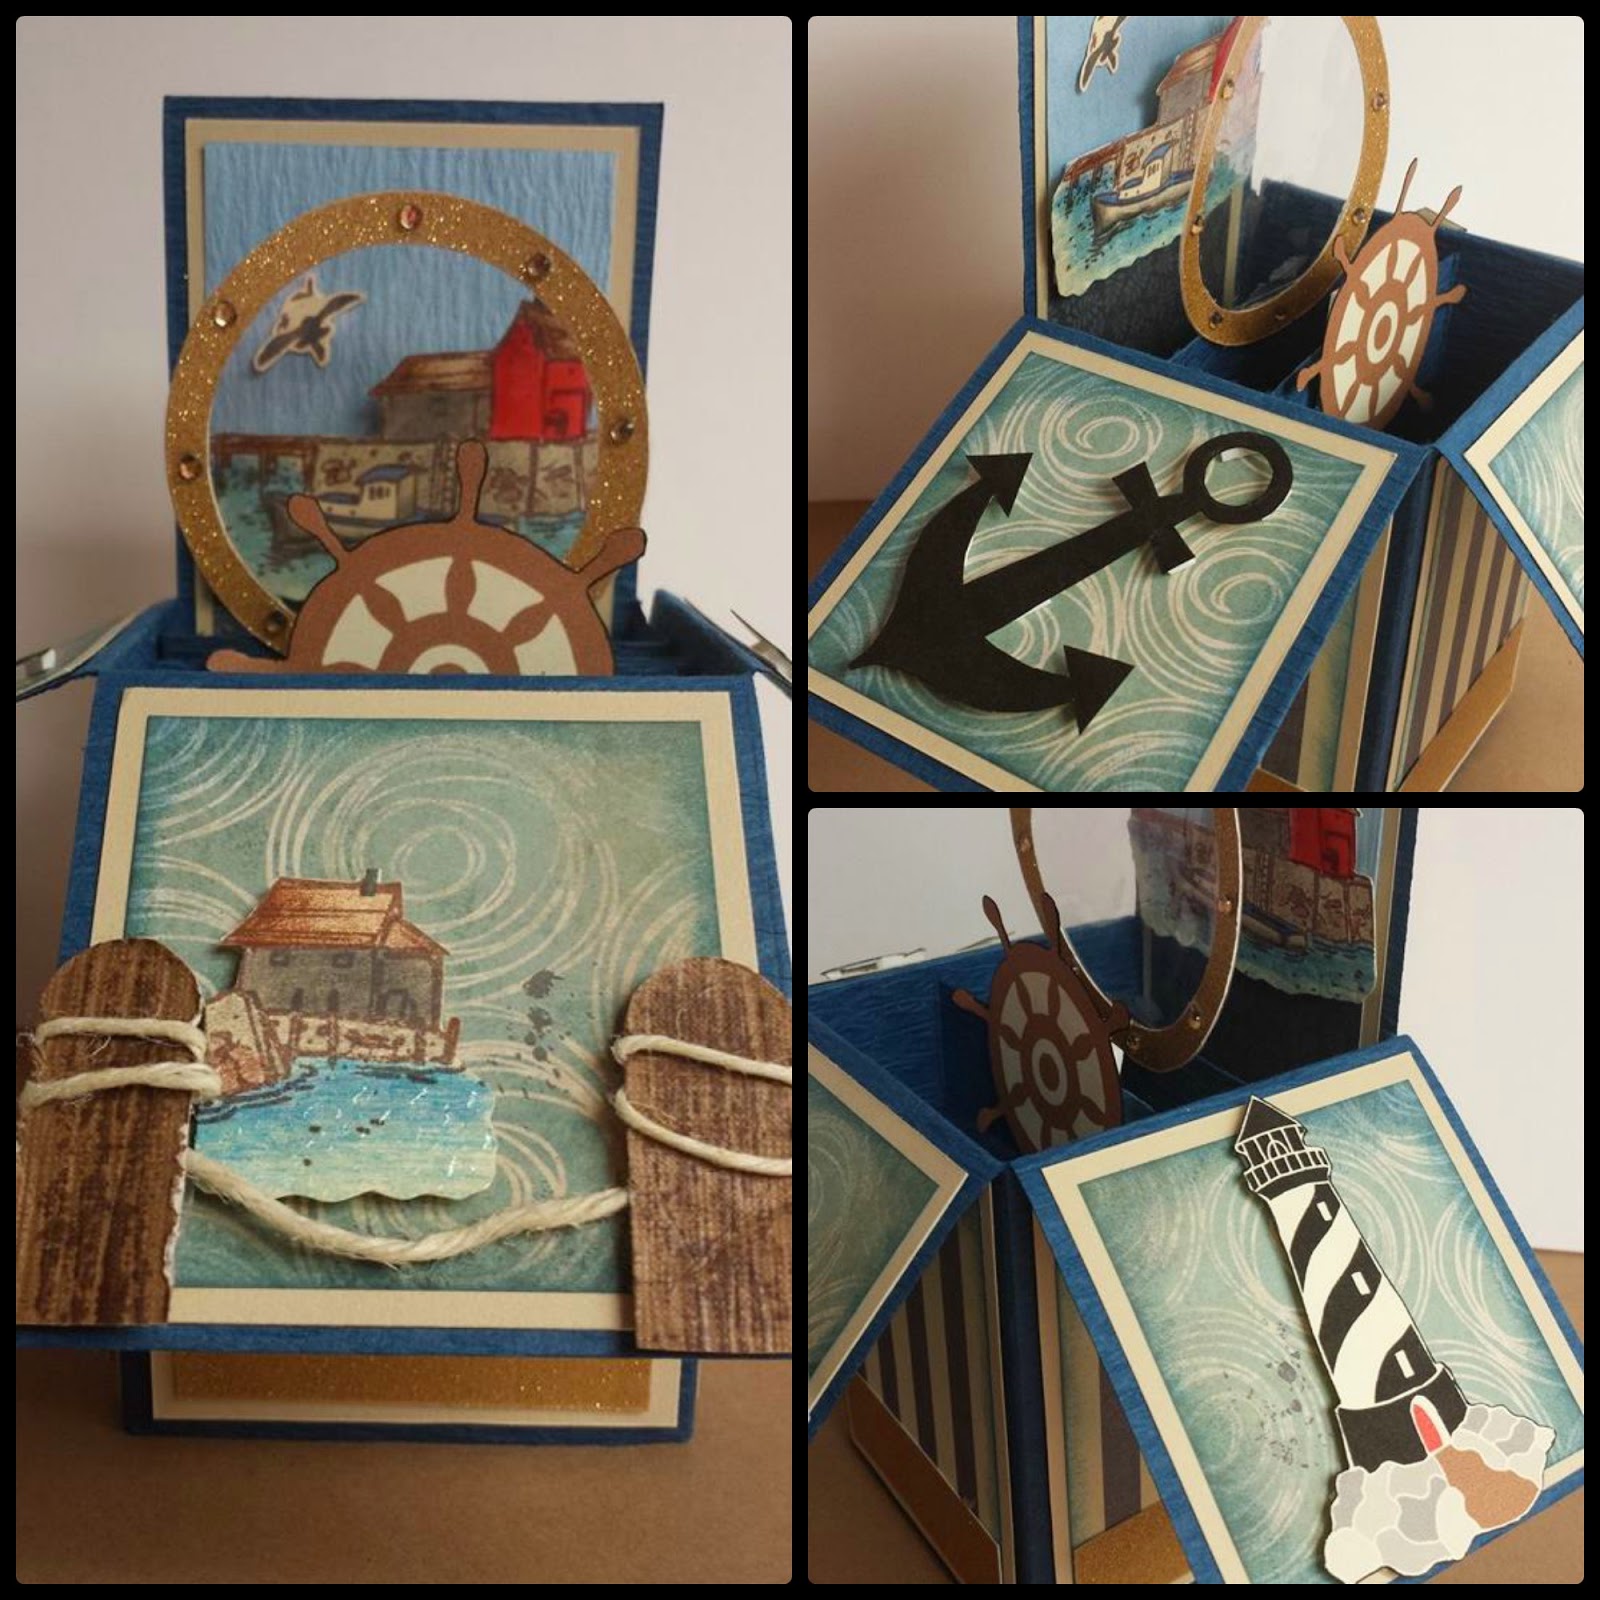
The DT made some very and creative pop up box cards using wonderful stamped images from the
DRS Designs Store.
Barbara
http://ladynurse4.blogspot.com/


DRS Designs - a family owned company since 1950 - boasts hundreds of original rubber
stamp designs. All images are available fully mounted, completely unmounted or mounted
on cling cushion and are proudly hand crafted in the USA. Our rubber stamp collection
includes a wide assortment of images including sentiments for all occasions, easy
background designs and fun technique stamps such as our stained glass and plaid designs.
The DRS Designs website features a huge card sample gallery, online demos and tips, a
secure shopping area and more. Be sure to visit our daily blog with posts from our fantastic
design team for inspiration and ideas.
to the winner of this new challenge.
----------------------------------------------------------------------------------------------------------Are you ready for our next fun challenge? Challenge #19- Anything Goes. But first here is our feature inspiration tutorial....
The DT made some very and creative pop up box cards using wonderful stamped images from the
DRS Designs Store.
Barbara
http://ladynurse4.blogspot.com/
My tip: use chipboard or other heavy embellishments on your three flaps you want to stay open to keep them open.
Melissa - Paper Shenaniganz
Tip: Go around the edges of your die cuts with a brush tip marker. It gives them a more finished look, especially if you hand cut them.
Teresa-Fresh and Renewed
Tip: Mat your patterned paper. It gives the whole box card a more finished look.
Tip: Check out different You Tube videos, like the one featured for this challenge, to adjust sizes for your box card. You can even do a horizontal one.
Cindy---In Love with PAPER
TiP: Add borders to your strips that hold up your pop ups.
Brenda - Disney Girl
Tip: Don't be afraid to give this card a try. It is so much easier than it looks and SO much fun!
Kimberly- Creations by Kimmy
 Tip: You don't necessarily have to use the entire stamped image on a project, try cutting or punching out the main image it can give a totally different perspective and look to a project!
So what do you think?
Kimberly- Creations by Kimmy
So what do you think?
To find more information on how they did that, please click on their name/blog or the challenge under their picture. Thanks for playing along.
We hope these design team projects inspire.
We hope these design team projects inspire.
Your challenge:
Anything goes: cards, banners, layouts but if you create a POP UP BOX CARD, you will get an extra chance entry for this challenge sponsor.
This challenge ends on Saturday, May 17th at 10:00 pm EST. Also, you can join up to our Facebook group: Scrapbook Blessings Club for more fun, games, inspiration, tips and techniques.
If you do make a project using the featured technique, homemade flower,
your project and blog may be showcased on the SBC Facebook group.
And as always, comments are appreciated. Thank you for stopping by and Have a blessed day!
Gorgeous Box Cards!!! I love Sandy's pink creation!! Fantastic!! Thanks for another fun challenge!
ReplyDelete- Susan
{Scrap A Thousand Words}
Open-Minded Crafting Fun Challenges
Awesome tutorial and beautiful box cards made by your DT! I really want to try this!
ReplyDeleteI came back to link up my card but I don't see your linky. I'll be back later - thank you!
ReplyDeleteLinky code fixed, you can link up your entries now. Thanks for playing along with SBC!
ReplyDeleteThank you, Sandy!
ReplyDeleteThis comment has been removed by the author.
ReplyDeleteThank you for such a fabulous Tutorial on how to make a Card in a box. It was easy to follow and so much simpler than the Tutorial I tried to work off last week.
ReplyDeleteThese boxes are so much fun to make, they appear to be all the craze at the moment, they are popping up everywhere.
The Card in a Box creations by the DT members above are just out of this world ~ they are absolutely amazing ~ each and every one of them ~ thank you for sharing and also for allowing me to join in the fun Challenge :)
gorgeous cards design team.
ReplyDeleteSmiles Sher