
Hi everyone! Today is the 1st Sunday of the month and time for another video tutorials, but first lets see who is our winner from the Twisted Easel card and the design teams top 3 picks!!!


Cindy- In Love with PAPER
 TiP: Use up some of your 'ugly' paper by using it as the base that you glue all the triangles onto--nobody will see it :-)
Sandy~ A Working Moms Joy

 Tip: Paper Pack scraps are great to work with because the papers and colors all coordinate. Just put you scraps in a baggie for when you want your papers to "match" like my two examples.
The prize for this challenge comes from Bugaboo Digi Stamps- 7 stamps of your choice
WINNER
UT's Hobby Time
TOP 3 DT PICK
#3 Stephanie W. #9 Zenita
Facebook- Karen S.
Congrats to you all!!!
------------------------------------------------------------------------------------------------------------
Okay! So are you ready for our next challenge?
Challenge #5 is sponsored by My Creative Classroom.
They are giving away a free seat to any one online class.
The student will have up to one year to choose a class.
My Creative Classroom is an online arts and crafts learning center. Our interactive and in-depth courses are instructor led and filled with wonderful projects and techniques to help you get the most out of your supplies. Our Fall Semester offers over 100 classes to choose from. We also offer Library classes which feature retired classes at 40-50% off their original price!
Here's a sampling of our current Workshop classes:
- Color Inspirations: Gelatos!
- Crafting with the Cricut: Beyond Paper
- Post Cards with Mixed Media Techniques: Textures
- Gifts from the Heart
For challenge #5, we are going to be doing a Sunburst Card and our video tutorial is brought to you
This is fast becoming a favorite card design online.
Here are the inspiration cards done by the SBC design team...

Tip: Having designer paper in different colors and designs handy to have on hand i.e. Christmas, Thanksgiving, Valentine's Day, etc for different holidays.

Tip: Emboss some of the panels to add texture.


Tip: What a great project to use those pieces of paper in your stash scrap bin that you just can't bare to part with. I also have one additional tip - when I see a particular technique, I have an index card close by to write down all the dimensions along with the website that I can always refer back to the website if I need to.
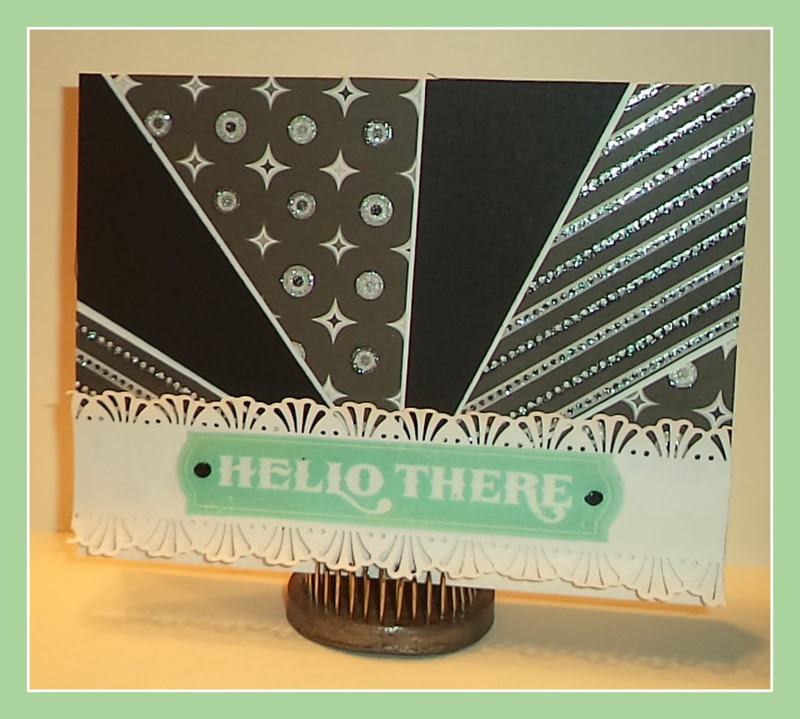
Cindy- In Love with PAPER

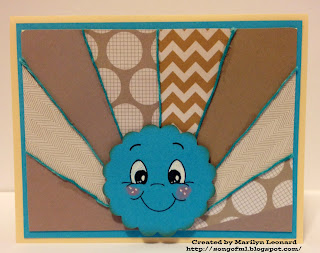
Sandy~ A Working Moms Joy

 |
| Tip: Add twine to give your card some interest and texture |
Teresa from Fresh and Renewed

Tip: Keep a variety of Cricut cuts handy to use as quick card embellishments.
Cristina vintagepink39

Cristina vintagepink39

Tip: Its good to keep matching scraps separate from your other scraps so when you want to make the sunburst card you can have it ready to go.
Now its your turn! Join us for the Tutorial Challenge #5. First, watch the video, then create your own version of the card shown in the tutorial (please try to keep it within the same lines, but your creative spin is what will set it apart!). Next, link it up! You will be entered to win the challenge price. If you don't have a blog, you can still submit your cards in our SBC Facebook Group Album.
We do have some rules for our challenges to make them fair so please view them at top by clicking the challenge rules/ winners tab. You can link up your cards below...
Complete rule list can be found on the Winner/Rules Page at the top of the blog:
- 3 entries per person.
- Challenge ends November 15th midnight, EST
- Enter your direct post link for your entry
- Link back to SBC
- Must be a follower of the blog to be eligible to win
Hope you have a blessed day and thanks for stopping by,

wow what a fabulous tutorial. Just adore the inspiration from the DT as well!!!
ReplyDeleteThanks a lot for picking up my project and congrats to all others.
ReplyDeleteAll the DT creations look fabulous. Brilliant color selection.
Great cards! I hope I get to play this week:-) Halloween kept me busy last week.
ReplyDeleteI just found your blog this evening. I LOVE it!! Thank you, Stephanie Wright (Top 3 this past week) for guiding me here. I hope that all of YOU will stop by the Word Art Wednesday Facebook page and "Like" us for the chance to win, and also.....I have blog candy at my personal blog here: www.karen-mycuprunnethover.blogspot.com
ReplyDeleteThanks for sharing this tutorial, and I look forward to more exciting tutorials and challenges here at Scrapbook Blessings!
Karen L
Word Art Wednesday, Blog Administrator
My Cup Runneth Over, My Blog
I love this technique. It looks great on a card. Thank you. Edwina Brown
ReplyDeleteI love making these cards!!!
ReplyDelete