
WELCOME
TO MFP STAMP SHOP


TO MFP STAMP SHOP
The Great Outdoors
BLOG HOP

JOIN US EACH DAY, June 21-24 FOR SOME OUTDOOR FUN. WE'LL HAVE TUTORIALS AND DT INSPIRATION. THERE WILL BE PRIZES FOR LEAVING COMMENTS ON THE DESIGN TEAM'S BLOGS AND PRIZES FOR TRYING OUR TUTORIALS. YOU WILL HAVE 2 WEEKS TO ADD YOUR PROJECT to the June 24th POST FOR US TO SEE SO THERE IS NO EXCUSE NOT TO JOIN IN THE FUN.
Please Hop along with us!!
You could win one of the MFP Stamp Shop Outdoor THEMED STAMP SETS Just comment on the following blogs ( don't forget this one ) each day for more chances to win! ( You do NOT need to comment on on all the blogs each day! The names are drawn randomly.) Try one of the tutorials shown during the Hop and add your photo to the Inlinkz at the bottom of the June 24 post. The winners will be announced on July 9, 2016 right here on the MFP Stamp Shop Blog. You can go back and comment if you missed a day. ( HINT: The more you comment the more chances you have to win. And comments on the MFP blog count twice. ) The deadline for commenting and posting pics of your projects is Friday July 8, 2016 at 10:00 PM EST.
You could win one of the MFP Stamp Shop Outdoor THEMED STAMP SETS Just comment on the following blogs ( don't forget this one ) each day for more chances to win! ( You do NOT need to comment on on all the blogs each day! The names are drawn randomly.) Try one of the tutorials shown during the Hop and add your photo to the Inlinkz at the bottom of the June 24 post. The winners will be announced on July 9, 2016 right here on the MFP Stamp Shop Blog. You can go back and comment if you missed a day. ( HINT: The more you comment the more chances you have to win. And comments on the MFP blog count twice. ) The deadline for commenting and posting pics of your projects is Friday July 8, 2016 at 10:00 PM EST.
Let's get started !!
Say the first word that comes to you when you hear
"The Great Outdoors"...
CAMPING!
We are a camping family in the summer! Can't get more outdoors than that!


Thanks for hopping along today,
Say the first word that comes to you when you hear
"The Great Outdoors"...
CAMPING!
We are a camping family in the summer! Can't get more outdoors than that!
For today's hop post, I wanted to show an easy tutorial. We are using stamps to make a very easy and cute layout. Stamps are a great way to personalize your pages.
Easy Scrapbook Layout
by Sandy Hentzel
Materials needed:
Stamps
Ink
Cardstock
Paper Slicer
Adhesive
markers or pencils
(photos)

You can make your layout base any size. The most popular is 8x8, 12x12 and 8.5x11.
For my project, I went with an 8x8 white base so that the stamps will show up nicely.
Using color card stock, I decided I wanted a triple mat. HTe first one measures 4x6 and
then the greens go up by an 1/4inch.

After cutting out your mattes, place your stamps (clean) on your layout to give you an idea
of placement. You don't want anything to cover your photos.

Using your ink, you will then stamp your images. You can either stamp all your images in black
or you can use color ink like I did here.
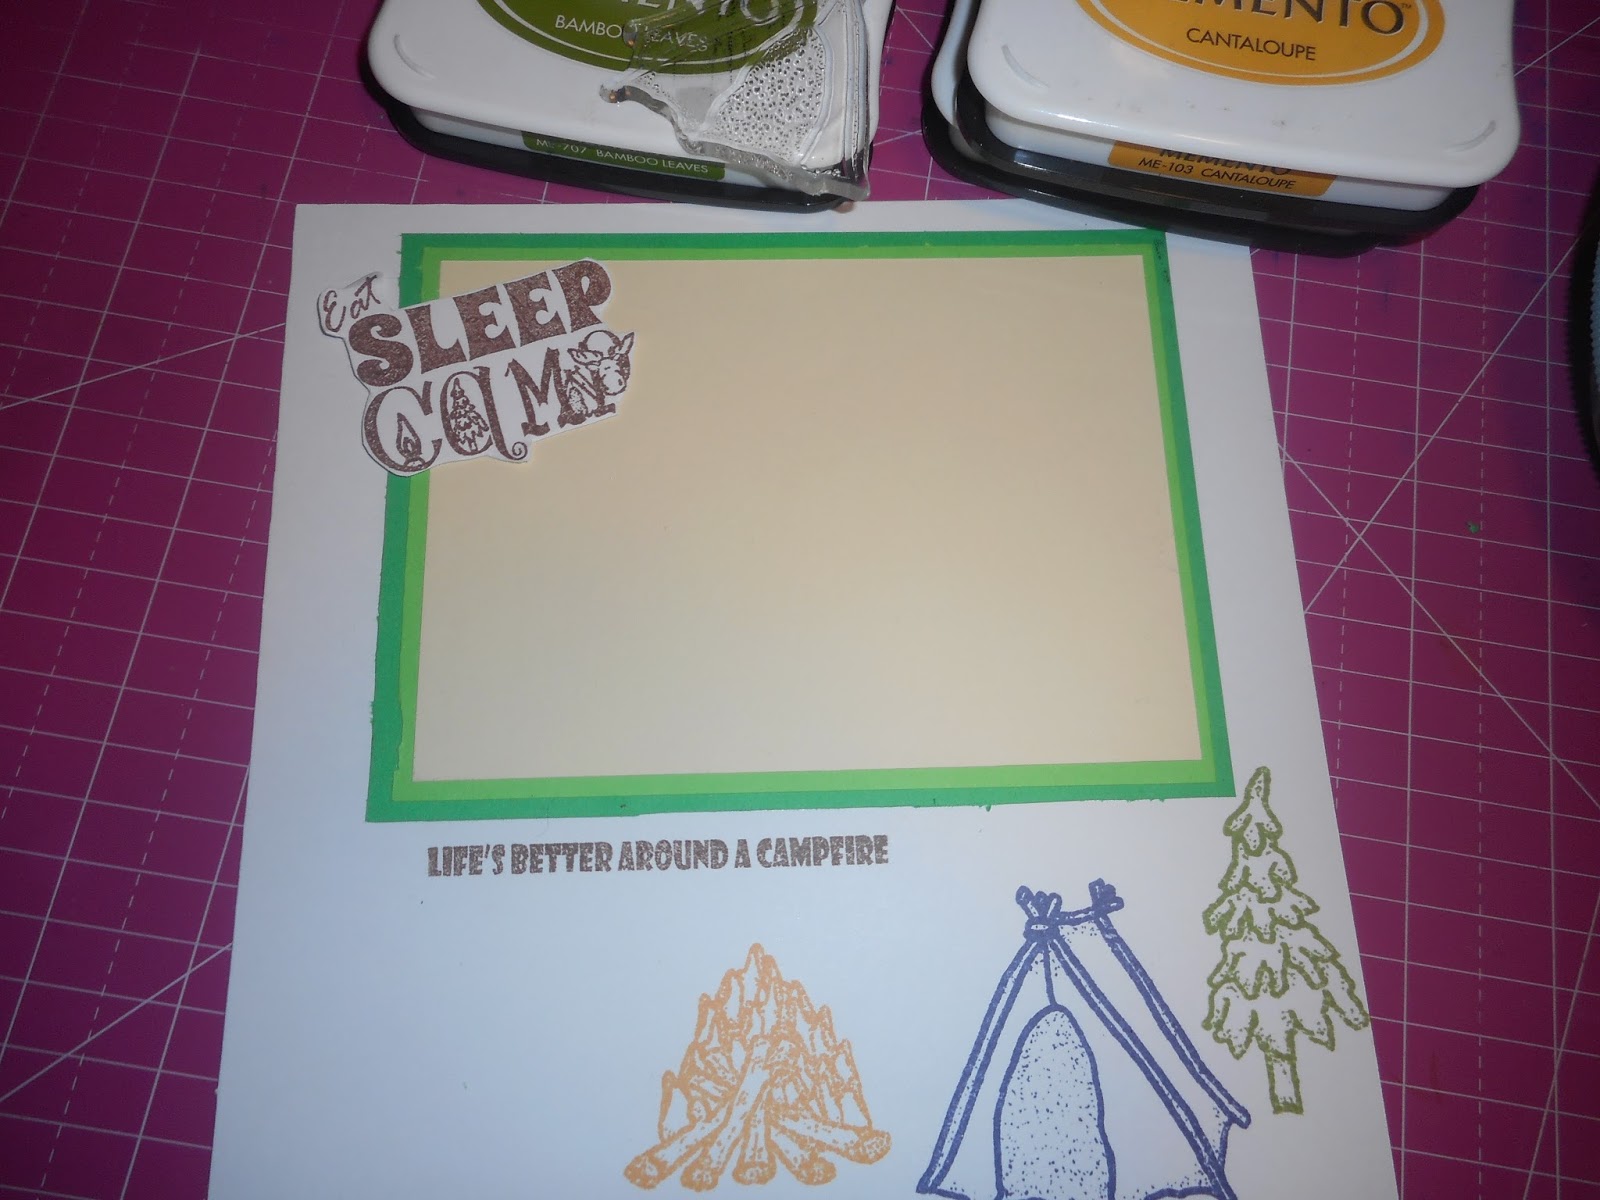
After I stamp my images, I used my Prisma Color pencils to color them. I wanted to you the sentiment "Eat, Sleep, Camp" as an embellishment so I fussy cut it and will adhere it over top of the photo with some pop dots. Stamps make great embellishments if you are stuck on sticker ideas.

And here is the final layout. All I need is my favorite photo of the kiddos camping last year and put it in the family coffee table scrap book.

I hope this tutorial inspires you to use your stamps on something other than a card.
Stamps used

Here's the Whole Design Team
Enjoy the hop! Come back each day and let us take you to the Great Outdoors. Get to work on the tutorials! Show us what you made by July 8th and check back on July 8th and check back on July 9th, 2016 to see if you won!!
We hope your enjoyed today's project. If you have a questions or suggestions, please leave it in the comments. Also, we invite you to join our Facebook groups: Scrapbook Blessings Club for more fun, games, inspiration, tips and techniques and YouTube Crafters. YouTube Crafters- https://www.facebook.com/groups/1608405749430235/ FB- SBC group- https://www.facebook.com/groups/TheScrapBookblessingsClub/ Thank you for stopping by and have a blessed day!
This is a wonderful background for your photo. A great way to display the trip!
ReplyDeleteExcellent layout and design. Thanks so much for all you do, Sandy!
ReplyDeletehugs
Excellent layout and design. Thanks so much for all you do, Sandy!
ReplyDeletehugs
WOW oh WOW Sandy - amazing art work here! Fabulous!
ReplyDeleteThe camping motifs make this look wonderfully outdoorsy!
ReplyDelete<3 J
jwoolbright at gmail dot com
HerPeacefulGarden.blogspot.com