
Meander Book

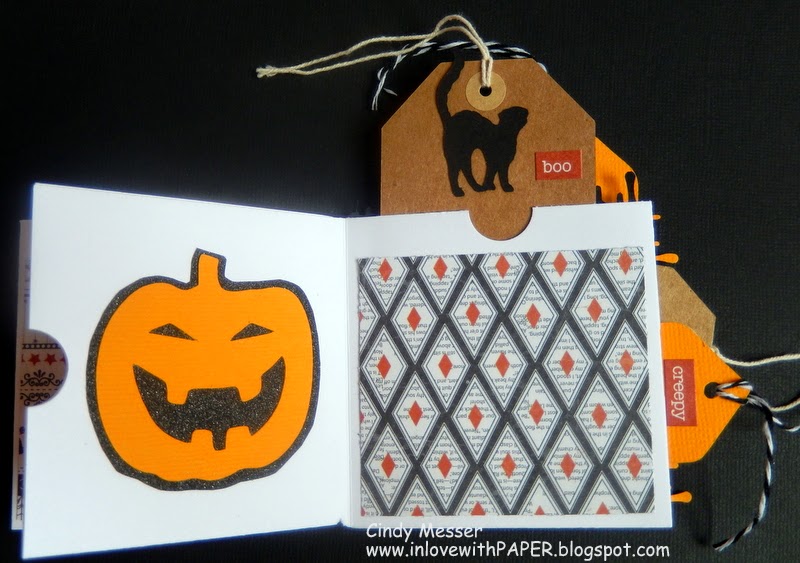
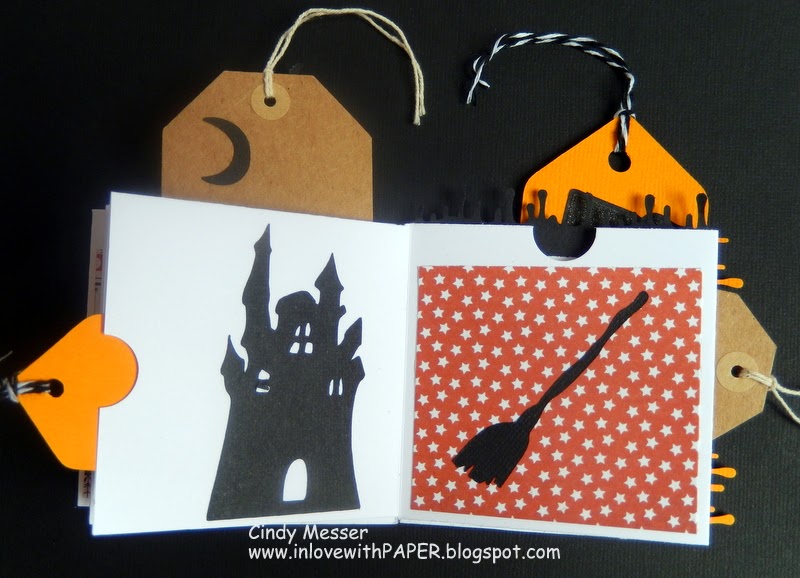
Hey kids.  Cindy back on the SBC blog today to share a really cute Meander Book.  I found the base for this super cute Meander book on utube, of course :-)  It was very easy to make.  I used a 12x12 sheet of white cardstock for the base.  So, this book is only 3x3" square.  There is a pocket on each page-either at the top or on the side.  Cool, huh?!! And I've used the Sept card kit to decorate it :-)  Anyway, when I make my next one I'll probably use double sided paper so it's just easier to decorate.  But, I love how it turned out :-)  Okay, let's meander through my book....LOL.  Lots of pictures!!!

Martha Stewart -Drippy Goo edge punch.  TC Chic & Scary Cricut cart - scary @ 1".  MS Seasonal Cake Art Cricut cart - cat (on tag) @ 1 1/2".

TC Chic & Scary cart - spider @ 2 1/2".

TC Chic & Scary - bat @ 1".

TC Chic & Scary - pumpkin @ 2".

TC Chic & Scary - witch @2".

TC Chic & Scary - broomstick @ 2 1/2", haunted house @ 2 3/4".

TC Chic @ Scary - bat @ 1".

TC Chic @ Scary - witch @ 2 1/2", mask @ 1".

TC Chic @ Scary - tree @ 2 3/4".
 
Plantin Schoolbook cart - Circle @ 2 1/4".   TC Chic & Scary - cat @ 1 3/4".

TC Chic @ Scary- cat (on pumpkin colored tag) 1", bats @ 1".  MS Seasonal Cake Art - cat (on Kraft tag) @1 1/2", Boo @ 1 1/4".   Plantin Schoolbook cart - tags @ 3 1/2", 2 1/2" (pumpkin colored).

Recipe:
Sept SBC card kit - Kraft tags, patterned papers, word stickers
black glitter paper
black floss on tags
small circle punch

Thanks for stopping by today!  I hope I've inspired you to try a Meander book.  They are sooo fun!

Cindy - In Love with PAPER

Comments

Post a Comment

We love comments! Please let us know what you think.

Popular posts from this blog

My Favorite Craft Tools and Giveaway!!!

Hi everyone, Today's video is a fun one for me. Since getting back into crafting I have noticed that I am pulling certain items over and over again and thought it would be fun to share with you. Two years ago, I took a step back from crafty and downsized 75% of my craft room.  However with just these awesome tools, I have been able to get back into the swing of things and I don't miss having a larger craft room. Personally, I feel every crafter should have these starting out.  They make creating easy and fun! Tools mentioned: Misti, Neehna Bright Cardstock, Distress Oxides, Ranger Dylusions die cut, In Love Art Shop word die cuts, ATG, Prismacolor Pencils, premade cards,Fiskars cutting blade and trimmer, Zig color pens, Wink Of Stella, Alcohol markers, t-ruler, Westcott 0 ruler, 6x6 paper pads, Versamark, EK Success powder tool, 3d Crystal Lacquer, Tombow adhesive, Momento/Hero Arts black ink, Cricut, Chameleon Black Pen, Pencil, Grid stamping block, etc. For the mont

MFP Stamp Shop June Blog Hop

Welcome to the MFP Stamp Shop June Blog Hop Let's get started!!!! This month's new Stamp Set Releases are: Featured  June 23 Paper Doll Chuck Featured  June 24   Paper Doll Chuck Formal and Hunting Featured  June 25  Background Diamonds and Flowers Featured  June 26 Pots and Vases 2 Please Hop along with us!! You have a chance to win one of these new stamp sets! Just comment on the following blogs ( don't forget this one ) each day for more chances to win! ( You do NOT need to comment on on all the blogs each day! The names are drawn randomly.) The winners will be announced on June 26, 2015 right here on the MFP Stamp Shop Blog. You can go back and comment if you missed a day. ( HINT: The more you comment the more chances you have to win. And comments on the MFP blog count twice. ) The deadline for commenting is Friday June 27, 2015 at 10:00 PM EST. Okay for this card, I went a different route. I thought with the holiday coming up, why not try to make Chuck's hunting ou

Building Block Graduation Card

Hello, everyone! Melissa here on to share a "building block" style card with you. I made this one graduation themed, since there are a ton of graduations going on right now. Hope you enjoy this card, and are inspired to try it out yourself. Here is the tutorial I followed from Split Coast Stampers. To make it easier, I will give you all the measurements, here. It looks harder than it is, I promise. Start with a piece of cardstock in your desired color that is 5.5 x 10.5. Put the 10.5 inch side along the top of your score board or paper trimmer, and score at 3.5 inches and 7 inches. Fold the first score line in a mountain fold, and the second in a valley fold. You should end up with a "z" fold card. The next part can get a bit tricky, so make sure you watch the video to fully understand what I am about to explain. On the back side of the "valley" fold, take a ruler and pencil and mark these measurements: 3/8 1 3/8 1 5/8 2 5/8 2 7/8 3 7/8