

Hey kids! It's Cindy for the Scrapbook Blessings Club blog today and I've got a fun glitter embossing technique to share with you.
TiP: Be sure and close your Versamark pad before applying the embossing powder.
Okay, grab the following supplies and let's get started :-)
Versamark pad
Embossing Tinsel (or you can use embossing pwd and glitter)
Heat tool
embossing folder
baby wipe

Steps:
1-open the embossing folder and generously apply Versamark to one side (I used the raised side and got glitter coverage on the background of the embossed image)
2- put your cardstock inside the embossing folder and run it through your Cuttlebug
3- apply your embossing tinsel (this has glitter right in it) or you can mix embossing powder with glitter about half and half ...should look like the photo below:

4- put excess embossing pwd back into the container. Clean your embossing folder with a baby wipe.
5- heat the embossing tinsel/pwd/glitter with your Heat tool until it turns darker and starts to sparkle.
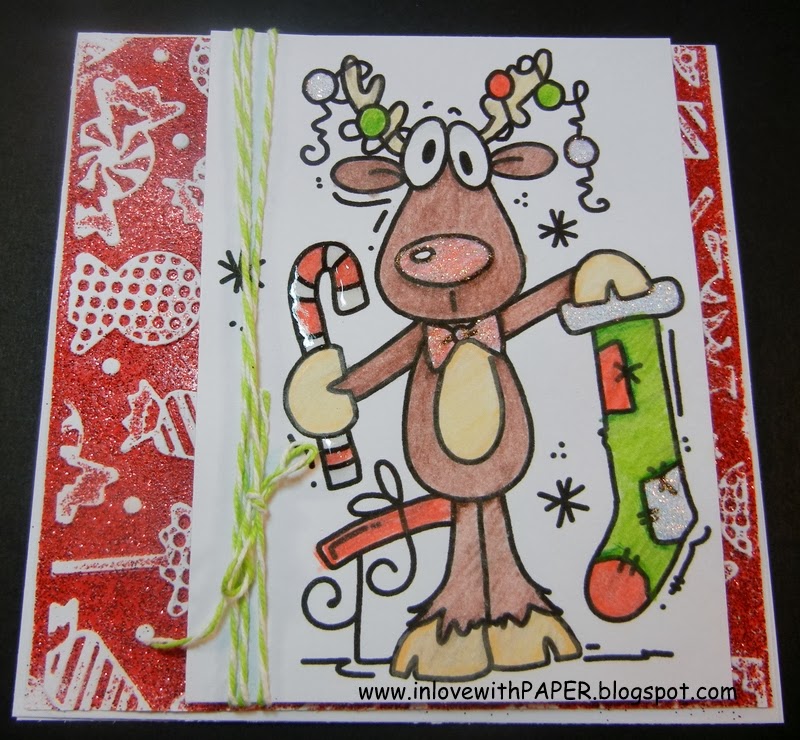
And here is the card I created with this glitter embossed background:
 Add'l info:
5" square cardbase in white
Bugaboo Digital image - Reindeer Christmas Goodies (They are having a sale-- 50% off all digital images until Dec 31st)
watercolor pencils
blender pen
Diamond Stickles
Glossy Accents - candy cane
Sew Easy floss in limeade
pop dots
PC embossing folder - Christmas set
Thanks for stopping by the SBC blog today! I hope I've inspired you to grab your embossing supplies and make something cool! I want to wish you and your family a Very Merry Christmas and a Happy, Healthy 2014!!
Have a blest day!
Cindy --- In Love with PAPER

TiP: Be sure and close your Versamark pad before applying the embossing powder.
Okay, grab the following supplies and let's get started :-)
Versamark pad
Embossing Tinsel (or you can use embossing pwd and glitter)
Heat tool
embossing folder
baby wipe
Steps:
1-open the embossing folder and generously apply Versamark to one side (I used the raised side and got glitter coverage on the background of the embossed image)
2- put your cardstock inside the embossing folder and run it through your Cuttlebug
3- apply your embossing tinsel (this has glitter right in it) or you can mix embossing powder with glitter about half and half ...should look like the photo below:
I started with a white piece of cardstock. As you can see I missed a little spot with the Versamark...oops.
4- put excess embossing pwd back into the container. Clean your embossing folder with a baby wipe.
5- heat the embossing tinsel/pwd/glitter with your Heat tool until it turns darker and starts to sparkle.
And here is the card I created with this glitter embossed background:
5" square cardbase in white
Bugaboo Digital image - Reindeer Christmas Goodies (They are having a sale-- 50% off all digital images until Dec 31st)
watercolor pencils
blender pen
Diamond Stickles
Glossy Accents - candy cane
Sew Easy floss in limeade
pop dots
PC embossing folder - Christmas set
Thanks for stopping by the SBC blog today! I hope I've inspired you to grab your embossing supplies and make something cool! I want to wish you and your family a Very Merry Christmas and a Happy, Healthy 2014!!
Have a blest day!
Cindy --- In Love with PAPER
I've never tried mixing glitter and embossing powder. TFS Cindy!
ReplyDeleteThanks for sharing this tip. Wonderful embossing folder. Adorable card. Edwina Brown
ReplyDeletevery pretty! nice technique!
ReplyDeleteI must try this technique.
ReplyDeleteIt has been forever since I've heat embossed.
I love your tips of using the folder and adding glitter to the embossing powder.
Your card turned out perfect.
And look no one will know you missed the spot. lol
Thanks for sharing.
Crafty hugs,
D~
DesignsByDragonfly.blogspot